Category: Baby Prep

  • What Actually Goes in the Diaper Bag — and What You Can Leave at Home

    What Actually Goes in the Diaper Bag — and What You Can Leave at Home

    ⚠️ Affiliate Disclosure: This post contains affiliate links. I may earn a small commission at no extra cost to you.

    There is a specific kind of panic that happens in a restaurant bathroom when the baby needs a change and you are elbow-deep in the diaper bag trying to find the cream.

    You are rummaging past three muslin cloths, two spare outfits, the toy you packed just in case, and something you forgot you even put in there.

    I overpacked our diaper bag for the first two months.

    Then I did a proper edit.

    I kept what we actually reached for, took out everything else, and going out became genuinely easier.

    This is that edit: what goes in, what stays home, and the diaper bag that made the whole system work.


    The bag — get this right first

    We used the Astro Alan Diaper Bag Backpack, and I genuinely loved how functional it was.

    It had 19 pockets, but more importantly, the pockets actually made sense. Not just random compartments where things disappear — actual spaces that fit the things you need.

    The front pocket had insulated lining for a bottle. There was a USB charging port on the side. The built-in waterproof changing station folded out and clipped back in without becoming a whole production. It had stroller straps, so it could hang off the pram hands-free.

    And it looked like a normal backpack.

    That part mattered more than I expected.

    Because the diaper bag that looks good and works well is the one you actually grab on the way out.

    Do not underestimate that.


    What actually goes in — and stays in

    These are the things we reached for on almost every outing.

    Not the “maybe we’ll need this once someday” items.

    The actual, useful, worth-the-space things.


    Bottles

    Milk bottles in the front pocket insulated for prolonged freshness. Use whichever bottle your little one prefers.

    Mine preferred the Dr. Brown’s natural flow Anti colic ones.


    Diapers — 3 to 4

    Not two.

    Not one “just in case.”

    Three minimum.

    Blowouts happen in sequences, and the day you pack light is always the day you regret it.


    Wipes — travel pack, always refilled

    A travel-size wipe pack is enough for most outings, as long as you actually refill it.

    I kept ours in the same side pocket every time because muscle memory matters when you are changing a wriggling baby on a public changing table.

    The key is not carrying the biggest pack.

    The key is knowing exactly where the wipes are without searching.

    Don’t forget to get anti bacterial hand wipes or travel sized sanitizer. I needed more times than I would care to count.


    Portable changing mat

    Even with a diaper bag that has a built-in changing station, I still liked having a portable changing mat inside.

    The Tiny Twinkle Secure Grip Waterproof Changing Pad folds flat, wipes clean, and gives you a clean surface anywhere.

    Public bathroom changing tables are not something I wanted to put my baby directly on.

    This solved that.


    Diaper cream — travel size

    Not the full tub.

    A travel-size Boudreaux’s Butt Paste or a small decanted amount is enough.

    I used diaper cream preventatively during changes on the go because it was easier than dealing with irritation later.

    Small tube. Same pocket. Always there.


    Disposable diaper bags

    These are not exciting, but they solve a very real problem.

    When there is no bin nearby, or the bin is not somewhere you want to leave a diaper loose, disposable diaper bags are useful.

    They take up almost no space and make outings less stressful.


    One spare onesie — sized up

    One.

    Not three.

    If you need more than one spare outfit, you are probably heading home anyway.

    I liked keeping one slightly bigger onesie in the bag because blowouts were the main reason we needed it, and a snug outfit only made that situation worse.

    Fold it flat. Keep it in the same pocket. Replace it as soon as it gets used.


    One muslin cloth

    Not four.

    One good muslin cloth does a lot.

    It works for spit-up, shade, an impromptu nursing cover, or a backup changing layer.

    The Comfy Cubs muslin cloths fold down small, dry quickly, and are much more useful than a tiny burp cloth.


    Nipple cream — if breastfeeding

    If you are breastfeeding, keep a small Lansinoh nipple cream tube in the diaper bag.

    Feeds happen on the go.

    And this should not be the thing you reach home wishing you had packed.

    A small tube in the front pocket was enough.


    Pacifier — in the case

    If your baby takes one, keep a pacifier in a case.

    Not loose in the bag.

    Not floating around with snack crumbs, receipts, wipes, and everything else.

    We used the Philips Avent Soothie, and I kept it clipped inside a pocket so it did not disappear to the bottom of the bag.


    Snack and water — for you

    Breastfeeding thirst and hunger do not stop just because you are out of the house.

    I always liked having:

    This is where the diaper bag being roomy actually mattered.

    The HydroJug Traveller or a similar large tumbler in the side pocket made outings easier because I was not relying on finding water once we were already out.


    Portable sound machine

    The Hatch Go was useful because naps do not always happen at home.

    It clipped to the diaper bag or pram and gave us white noise wherever we landed — car rides, grandparents’ house, a walk, a corner of someone’s living room.

    It was not a magic sleep fix.

    It was just one familiar sound in an unfamiliar place.


    Phone charger

    A long cable or small charging setup is one of those things you do not think about until your phone is dying during a long outing.

    The Astro Alan bag has a USB port on the outside, so you can keep a power bank inside and run the cable through the port.

    Small detail. Very useful.

    Especially when you are using your phone for maps, photos, messages, feeding timers, or just staying awake during a long feed.


    What stays home

    These are the things I packed religiously at first and barely used.

    Once I removed them, the bag felt lighter and easier to use.


    Full pack of wipes

    The travel pack is enough for normal outings.

    If you truly run out, you can usually buy more. A full pack adds bulk fast.


    More than one spare outfit

    One spare outfit is useful.

    Three is fear-packing.

    If you are dealing with multiple outfit-level disasters, the outing is probably over anyway.


    Multiple toys

    One small favourite is enough.

    The rest can live in the pram or car seat. The diaper bag does not need to become a toy bin.


    Full-size creams or lotions

    Travel size only.

    Full tubs take up too much space and make the bag heavier than it needs to be. Decant, buy small, or keep the full-size version at home.


    The bulb aspirator

    I know it feels like something you should carry.

    But for regular outings, we never used it. The NoseFrida lived at home.


    Formula “just in case”

    This depends on your feeding situation.

    If your baby is formula fed, of course pack what you need.

    But if your baby is not formula fed, packing formula every single day “just in case” adds weight for a scenario that may be very unlikely.

    I would only pack it for longer outings, remote places, or days when I knew we might be out much longer than planned.


    The diaper bag edit rule

    Here is the rule that finally helped:

    The bag should feel light enough that you actually want to pick it up.

    It should not feel like you are packing for a three-day trip every time you leave the house.


    One bag, one grab, everything covered

    The diaper bag that works is the one already packed when you need to leave.

    That means:

    • everything has a pocket
    • everything gets refilled when you get home
    • nothing inside is dead weight

    The Astro Alan made this easier because the pockets actually made sense.

    After a week, I knew exactly where everything was without looking.

    That is the bar.

    One bag. One grab. Everything covered. You’ve got this Mama!

    📌 Save this and use it to edit your diaper bag before the next outing.


    Also on Mama Rooted

  • The Baby Diaper Caddy Setup That Went Everywhere With Us

    The Baby Diaper Caddy Setup That Went Everywhere With Us

    ⚠️ Affiliate Disclosure: This post contains affiliate links. I may earn a small commission at no extra cost to you.

    Our diaper caddy wasn’t just for diapers.

    It was the thing we grabbed before moving from the bedroom to the living room, before leaving for the car, before sitting down for a long feed, before anything that might turn into, wait, where is the…?

    It travelled with us — bedroom, living room, sometimes the car. And because it went everywhere, it ended up holding a lot more than diapers and wipes.

    The goal was simple:

    Here’s exactly what lived in ours — and why each thing earned its spot.


    The caddy

    We used the Parker Baby Diaper Caddy Organizer.

    What I liked most was that it had enough structure to stay upright, even when it was half empty. The handles were sturdy, the compartments actually helped, and it didn’t collapse into one big messy pile after a few days.

    That mattered because this caddy moved constantly.

    It wasn’t something we styled once and left untouched in a corner. It was used, restocked, carried, opened, rummaged through, and grabbed without thinking.


    Diapering essentials

    This was the core of the caddy — the things we reached for every single day.

    I kept:

    The changing pad was especially useful because we were not always changing her in the same spot. Sofa, bed, car, someone else’s house — the caddy made it feel less chaotic.


    Feeding

    The one feeding item that absolutely lived in the caddy:

    If you are breastfeeding, this is not something you want across the room. I kept one in every major feeding spot, and the caddy always had one too.

    In those early weeks, I used it constantly. After feeds, before things got worse, and especially when everything still felt tender and new.


    Comfort and cleanup

    This section became more important than I expected.

    I kept:

    The burp cloths were the thing I underestimated most. One or two is never enough. Keep a stack. You will use them.


    Spare clothes

    I always kept:

    Nothing fancy. Just soft, easy onesies sized up slightly.

    Because blowouts never happen when you are conveniently standing beside the dresser. They happen when you are settled, tired, or already running late.

    A spare outfit in the caddy saved us more than once.


    Comfort items

    A few little things made the caddy feel complete:

    The plushie was useful when we were moving from room to room or settling somewhere unfamiliar. The pacifier stayed clipped to the side so it didn’t disappear into the bottom of the caddy.


    Sleep on the go

    For naps, travel, and moving around the house, we kept:

    This clipped onto the caddy and came with us wherever we landed.

    Living room nap. Car ride. Grandparents’ house. Random corner where the baby finally started settling.

    White noise was one less thing to think about.


    For long feeds and leaving the house

    This was the part of the caddy that was technically for me — but honestly, it mattered.

    I kept:

    • Kindle — for long feeds and waiting rooms
    • HydroJug Traveller — filled before we left a room
    • Snacksprotein bars, dates, anything one-handed
    • Phone charger — long cable, never left behind

    The snacks were not optional. Newborn days have a way of making you suddenly starving at the worst possible time.

    And the water bottle had to be filled before I sat down. Every time.


    How we kept it from becoming chaos

    A diaper caddy can become a junk drawer very quickly.

    Three small habits made the biggest difference.

    1. Everything had a designated pocket

    Diapers and wipes went in the main compartment. Small items like cream, sanitiser, and pacifiers stayed in side pockets. Clothes and swaddles were folded flat at the bottom.

    If everything has a place, you can refill it without thinking.

    2. We restocked immediately after use

    Empty diaper pack out, new one in.

    Same day. Not “later.”

    Later is how the caddy becomes useless right when you need it.

    3. We kept one version for home and one for the car

    This was not aesthetic. It was practical.

    Having a duplicate of the essentials meant we were not constantly raiding one caddy to fill another. The home caddy stayed stocked. The car caddy stayed stocked.

    That small bit of preparation saved so much mental energy.


    Why it worked

    The caddy was not precious or perfectly styled.

    It was the bag we grabbed without thinking — and it almost always had what we needed.

    That was the whole point.

    Aesthetic matters, but functional matters more. Get a caddy with real structure, fill it with the things you actually reach for, and keep it stocked.

    Everything else is just nice to have.

    If I were building one again, I would keep the same rule:

    One caddy. One grab. Everything covered. No second trips.

    📌 Save this and build yours before the baby arrives. Lots of love, Mama Rooted.


    Also on Mama Rooted

  • The Postpartum Feeding Station I was so glad I set up before baby

    The Postpartum Feeding Station I was so glad I set up before baby

    ⚠️ Affiliate Disclosure: This post contains affiliate links. I may earn a small commission at no extra cost to you.

    The first few weeks of feeding a newborn — whether you’re breastfeeding, pumping, bottle feeding or all three — happen around the clock.

    You will feed on the sofa. In bed. On the nursing chair at 2am. In positions you didn’t know your body could hold. For stretches of time that blur together.

    The one thing that makes all of it more survivable: having everything you need within arm’s reach before you sit down.

    Because once the baby latches — or once you’ve got the bottle angle right and she’s finally settled — you are not getting up. You are not asking anyone to bring you anything. You are sitting there until she’s done.

    Set up your feeding station before the baby arrives. Third trimester you has the time. Postpartum you will not.

    First — where does the station live?

    Pick the spot where you’ll actually spend most of your feeding time. For most moms that’s one of three places:

    • A dedicated nursing chair in the nursery — if you have space and you’re planning to use it
    • A comfortable armchair or sofa corner in the living room — where you’ll be during the day
    • Your side of the bed — for night feeds, this is where the postpartum cart already lives

    Ideally you set up a version in all three places. A full station at your main daytime spot, a pared-down version next to the bed for nights. The items are largely the same — it’s just about which things need to be where.

    The chair — worth getting right

    You will spend hundreds of hours in this chair in the first year.

    The most important thing is back support. Breastfeeding without proper support — hunching forward, craning your neck to see the latch — leads to shoulder and neck pain that compounds over weeks. A chair with a proper back, armrests at the right height, and enough room to shift position during a long feed is not a luxury. It’s functional.

    If you already have a comfortable armchair that works, use it. If you’re choosing one specifically for feeding, look for:

    • A straight, supportive back — not a deep sink-in sofa
    • Armrests at roughly the height of your elbows when seated
    • Enough seat depth that you can sit with your back against the backrest and still have feet flat on the floor
    • Easy to wipe clean — spills are guaranteed

    The Graco Glider Elite Gliding Chair and the DaVinci Olive Upholstered Swivel Glider are both well-reviewed options with the support and cleanability you need.

    The nursing pillow — non-negotiable

    Do not try to hold the baby at the right feeding height with just your arms for weeks on end. Your shoulders will not survive it.

    A nursing pillow wraps around your waist and brings the baby up to breast or bottle height, freeing your arms and keeping your back in a neutral position. I used mine at every single feed for at least 8 months.

    The Boppy Original Nursing Pillow is the most recommended and the one I’d choose. The My Brest Friend Nursing Pillow is a good alternative with a firmer, flatter surface that some moms prefer for latch positioning.

    Water — more than you think you need

    Breastfeeding thirst is its own category of desperate. It hits mid-feed when both hands are occupied and you cannot do anything about it.

    Keep a large insulated tumbler at the station — filled before you sit down, every single time. The HydroJug Traveller 40oz keeps water cold for hours and the straw means you can drink without adjusting position or dislodging the baby. This is the one I used every day.

    Rule: fill it before you sit down. Every time. Without exception.

    Snacks — one-handed and within reach

    Breastfeeding burns hundreds of extra calories a day. Your body is working constantly. Hunger hits fast and hard, especially at night.

    Keep snacks at the feeding station that:

    • Can be eaten with one hand
    • Don’t require unwrapping or preparation
    • Are actually filling — not just something to chew

    What worked for us:

    • RXBAR Protein Bars — no wrapper fuss, genuinely filling, clean ingredients
    • Kind Protein Bars — easy to eat one-handed, good variety
    • Medjool Dates — natural sugar, iron, easy to grab one at a time
    • A small jar of nut butter with a spoon — sounds odd, works brilliantly at 3am

    Burp cloths and muslins — more than you think

    You will go through more burp cloths per day than seems possible. Keep a proper stack at the station — not one or two, a stack.

    Muslin cloths are better than standard burp cloths for this job. They’re large enough to actually protect your shoulder, absorbent, and dry fast between uses.

    The Comfy Cubs Muslin Burp Cloths are the ones I’d recommend — bigger than standard, soft, and they hold up to constant washing. Keep at least six at the station.

    Nipple cream — at every seat, not just one

    If you’re breastfeeding: nipple cream should be within arm’s reach at every single place you feed. Not in the bathroom. Not in the nappy bag. Right there.

    Apply after every feed in the first weeks — before the pain starts, not after. Lansinoh HPA Lanolin Nipple Cream is the one I used. Baby-safe, no need to wipe off before feeding, and the difference between using it and not using it in week one is the difference between manageable and miserable. Another thing I used along with it was the Earth Mama Nipple butter. Very moisturizing and soothing.

    The extras that matter more than you expect

    A few small things that round out the station:

    • Phone charger. Long cable, plugged in. You will be on your phone at every feed. Running out of battery at 3am with a baby attached is its own category of miserable.
    • Kindle. If you like reading like me, having a Kindle on hand makes the day feeds a little more manageable.
    • A small basket or caddy for everything. The Parker Baby Diaper Caddy works brilliantly here — use it to corral the snacks, cream, burp cloths and phone charger so nothing migrates.
    • Haakaa silicone pump. If you’re breastfeeding, keep the Haakaa at the station. Attach to the opposite breast at every feed and catch the letdown passively. Thirteen dollars. Builds a freezer stash without trying.
    • Hatch Go sound machine. For nap feeds where you’re trying to settle without fully waking, the Hatch Go Portable clips onto the chair and keeps the white noise going wherever you move.

    The night version — pared down for 3am

    At the bedside, you don’t need everything. You need the essentials and nothing that requires thought:

    • Water tumbler — filled before bed, every night
    • Two or three burp cloths — folded and stacked
    • Nipple cream — within reach without turning on a light
    • One protein bar or handful of dates — for the 3am hunger
    • Phone charger plugged in
    • Hatch nightlight at its lowest setting — enough to see by, not enough to wake you both up properly

    The night station rule: if you have to get up to get it, it doesn’t belong on the night station. Everything you need at 3am should be reachable without leaving the bed.

    Set it up before the baby comes

    I set up our main feeding station at around 34 weeks. By the time I came home from the hospital, everything was already in its place.

    Every feed for the first six weeks, I sat down and everything I needed was right there. No asking anyone. No getting up. No thinking.

    That’s the whole point of setting it up early. The less you have to think during a feed, the more energy you have for everything else.

    Set it up now. Postpartum you will be very glad you did. Lots of love, Mama Rooted.

    📌 Save this and send it to anyone building a feeding station for the first time.

    Part of the Mama Rooted postpartum prep series:

    The postpartum cart — everything on mine, tier by tier
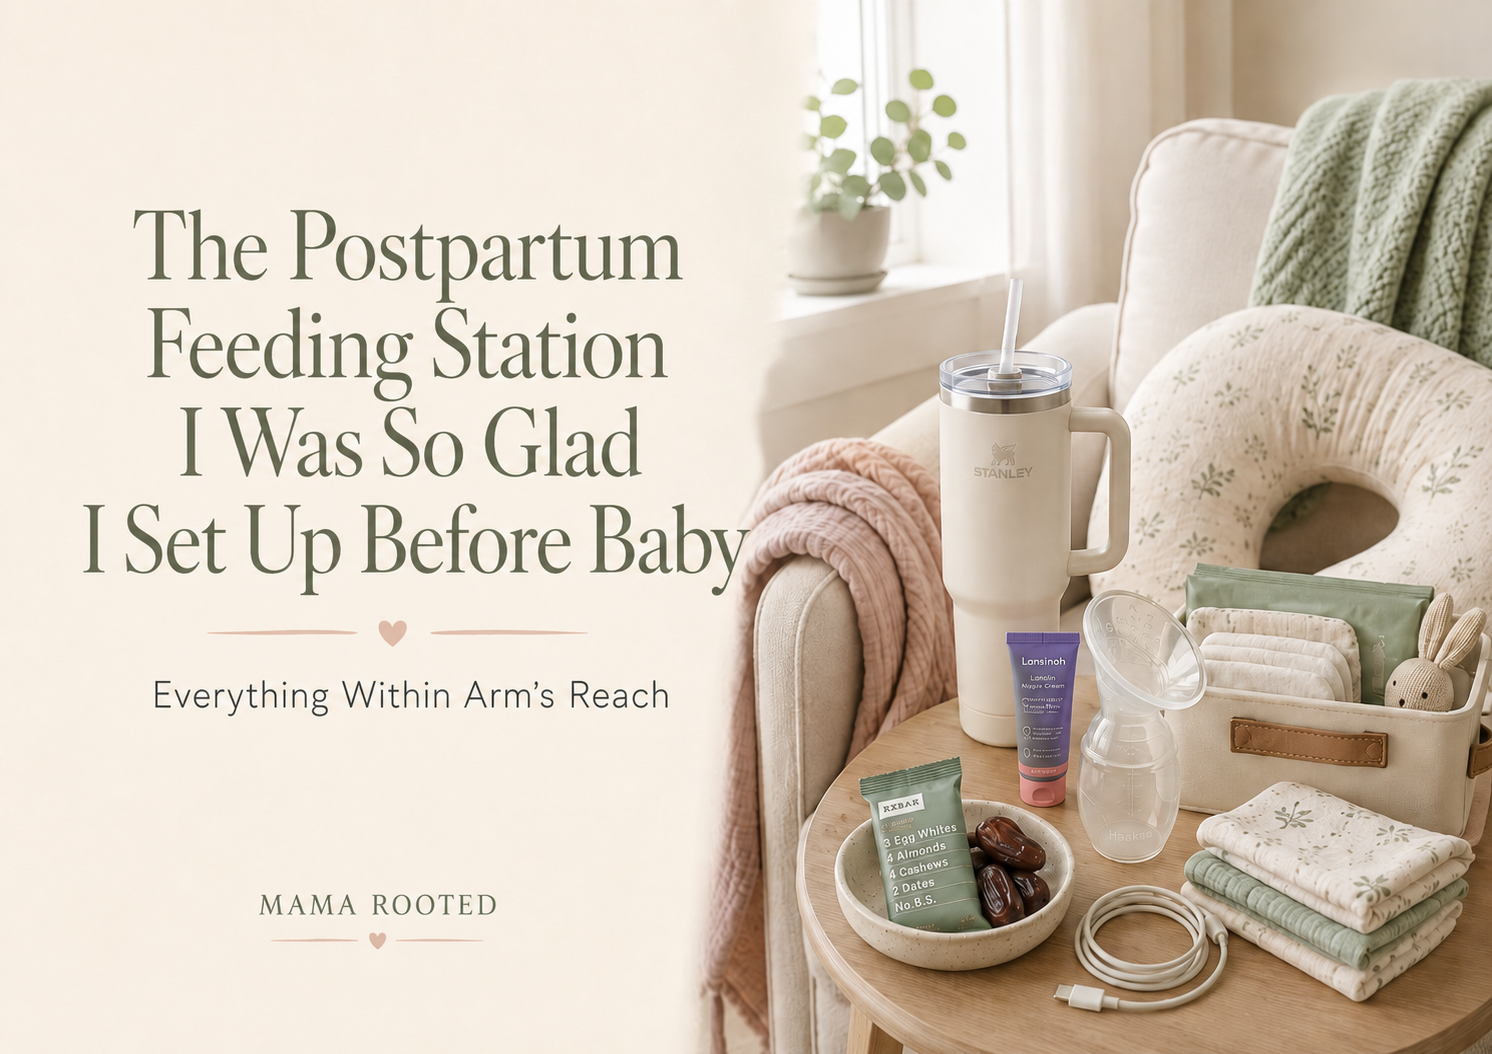
    The nesting party checklist — what to ask people to do before baby arrives

    My first 40 days morning routine

    Amazon Subscribe and Save — what to set up before baby arrives

    My Honest Postpartum Recovery Must Haves

  • What to Put on Amazon Subscribe & Save Before Baby Arrives

    What to Put on Amazon Subscribe & Save Before Baby Arrives

    ⚠️ Affiliate Disclosure: This post contains affiliate links. I may earn a small commission at no extra cost to you.

    There is a specific kind of 11pm panic that every new parent knows.

    You reach for the wipes. The pack is empty. The backup pack you were sure you had is also empty. And tomorrow morning there will still be a baby who needs changing.

    Amazon Subscribe & Save is the thing that stopped this from happening to us.

    It is not glamorous. It is not a cute baby product. It does not photograph well for a registry flat lay.

    But for the things you use constantly — wipes, diaper cream, dish soap, supplements, one-handed snacks — it quietly removes a whole category of mental load.

    Set this up before the baby arrives.

    Third trimester you has the headspace for it.

    Postpartum you does not.


    How Amazon Subscribe & Save works

    On eligible Amazon products, you will usually see a Subscribe & Save option near the regular purchase button.

    You choose how often the item arrives, how many you want, and when the first delivery should come. Then Amazon sends it automatically on that schedule.

    You can usually skip, pause, change the frequency, adjust the quantity, or cancel through your Amazon account.

    The discount varies by product, category, and current Amazon terms, so always check the savings shown on the product page before subscribing. Some items offer a small discount, and some orders qualify for higher savings when multiple subscriptions arrive together.

    The real benefit is not just the discount.

    It is not having to remember one more thing when you are running on broken sleep.


    The 5 subscriptions I would set up first

    If you do nothing else, start with these:

    1. Baby wipes
    2. Diaper cream
    3. Bottle and pump-part dish soap
    4. Postnatal supplements
    5. One-handed snacks

    Diapers can be useful too, but sizing changes fast. I would set a reminder to review diaper size every few weeks instead of blindly subscribing too far ahead.


    Baby wipes

    You go through more wipes than seems physically possible.

    Not just for diaper changes. For spit-up, hands, faces, car seats, changing mats, and whatever mysterious sticky thing is suddenly on the sofa.

    What I’d do:
    Subscribe to a bulk pack and set the first delivery for 2–3 weeks before your due date.


    Diaper cream

    Diaper cream is one of those things you do not want to discover is empty after the rash has already started.

    I liked having one open and one backup.

    What I’d do:
    Keep one in the diaper station and one in the postpartum cart. Subscribe if it is a product you already know you like.


    Nipple cream

    If you are breastfeeding, nipple cream is one of those tiny things that ends up everywhere.

    Nightstand. Nursing chair. Postpartum cart. Diaper bag. Sofa.

    I used it after feeds and hated being without it.

    What I’d do:
    Buy more than one tube and keep them where you actually feed.


    Postnatal supplements

    This is exactly the kind of thing you are likely to forget to reorder when you are sleep deprived.

    If you already have a postnatal supplement your provider is happy with, put it on subscription before baby arrives.

    What I’d do:
    Set the delivery frequency based on the bottle size, then review after the first month.


    The less obvious things worth adding

    These are not always on baby-prep lists, but they made a real difference in our house.

    Bottle and pump-part dish soap

    If you are washing bottles, pacifiers, pump parts, Haakaa pieces, or toddler cups, dish soap disappears fast.

    A fragrance-free or baby-safe option was one of those boring things I was glad not to think about.

    Disposable breast pads

    If you are breastfeeding, leaking can be constant in the early weeks.

    Have one box ready before your due date. Subscribe later only if you are actually using them often.

    One-handed snacks

    Breastfeeding hunger is its own category of desperate.

    Protein bars, nuts, dates, energy bites — whatever you will actually eat with one hand — are worth having before baby arrives.

    Fragrance-free laundry detergent

    Baby clothes, muslins, burp cloths, swaddles, sheets, towels — the laundry becomes absurd very quickly.

    A gentle, fragrance-free detergent is one of those household basics that suddenly becomes a baby essential.

    Household staples

    Coffee. Toilet paper. Hand soap. Dish soap. Bin bags. Paper towels.

    These sound too basic to mention, but running out of them with a newborn and no sleep is miserable.

    Take ten minutes before baby arrives and subscribe to the household staples you already use regularly.

    Not because they are exciting.

    Because future you should not have to think about them.


    What I would not put on Subscribe & Save before baby arrives

    This is where it is easy to overdo it.

    Subscribe & Save is useful when it removes predictable, recurring needs from your brain.

    It is not useful when you subscribe to things before you know whether they work for your baby.

    Do not over-subscribe to one diaper size

    Babies grow fast. Fit changes. Brands fit differently.

    Start small and review often.

    Do not subscribe to formula before you know what baby tolerates

    Unless your provider has already recommended a specific formula and you know it works for your baby, wait.

    Formula preferences and tolerance can change.

    Do not bulk-subscribe to bottles or pacifiers

    Some babies are picky.

    Buy a small starter amount first. Subscribe only once you know what your baby accepts.

    Do not subscribe to skincare before testing it

    Newborn skin can be sensitive.

    Try one product first before committing to repeat deliveries.

    Do not subscribe to anything you are not actually using monthly

    A subscription is only helpful if it removes mental load.

    If it creates clutter, skip it.


    How to set it up quickly

    This is simple enough to do in one sitting.

    1. Search for the product on Amazon.
    2. Choose the Subscribe & Save option if it is available.
    3. Pick a delivery frequency.
    4. Set the first delivery for 2–3 weeks before your due date.
    5. Add a reminder to review everything after the baby arrives.

    Start with monthly for high-use items like wipes.

    Use every 2–3 months for slower items like detergent, soap, or supplements.

    Then review it once you know your baby’s actual rhythm.


    Make this a nesting party task

    This is a perfect job for someone who wants to help but does not know what to do.

    Ask a partner, sibling, or tech-comfortable friend to sit with you and set it up before your due date.

    Give them the list.

    Let them help you remove repeat purchases from your head.

    This is exactly the kind of practical, invisible support that actually matters.

    Not just gifts.

    Not just cute clothes.

    Systems that keep working after everyone goes home.


    The honest reason this is worth doing

    The mental load of new parenthood is relentless.

    The knowing what needs restocking. The tracking what is running low. The 11pm panic when something essential is suddenly empty.

    Subscribe & Save does not solve all of it. But it quietly removes a whole category of it.

    Set it up once. Review it when your baby grows.

    Let the boring things arrive without needing a place in your head.

    That is the whole point.


    Get the free Nesting Party Checklist

      We respect your privacy. Unsubscribe at anytime.

      No Spam. Just practical postpartum and baby-prep resources from Mama Rooted.

      📥 Want this as part of a bigger pre-baby prep list?
      Download the free Mama Rooted Nesting Party Checklist — it includes Subscribe & Save setup, postpartum cart, feeding station, freezer meals, house prep, and the small tasks people can actually do before baby arrives.

      📌 Save this and set it up this week. Post partum you will thank the third trimester you. Lots of love, Mama Rooted.


      Also on Mama Rooted

    • The Ultimate Nesting Party Checklist: What to Ask Friends and Family to Do Before Baby Arrives

      The Ultimate Nesting Party Checklist: What to Ask Friends and Family to Do Before Baby Arrives

      ⚠️ Affiliate Disclosure: This post contains affiliate links. I may earn a small commission at no extra cost to you.

      Nobody threw me a nesting party.

      But in the weeks before my due date, my family quietly did exactly what one looks like — without anyone naming it.

      My mother-in-law batch-cooked and stocked the freezer. My mom organised the house. My sister helped stock the postpartum cart. People showed up and asked, “What do you need?” and I, for once, actually told them.

      I didn’t know at the time that what they were doing had a name, or that it was becoming a thing. But looking back, it was the reason I came home from the hospital to a prepared space instead of a chaotic one.

      If you have people willing to help before the baby arrives, this is how to actually use that help.

      The nesting party concept is simple:

      Instead of, or alongside, a baby shower where people bring gifts, your people come over and help you prepare. They cook. They organise. They stock stations. They make the invisible work visible before the baby arrives.

      This post is the list I wish I had.


      What is a nesting party?

      A nesting party is a pre-baby gathering where the focus is preparation rather than celebration.

      Your people come over — friends, family, whoever is willing — and help you get ready before baby arrives.

      Some cook. Some organise. Some build flat-pack furniture. Some stock the diaper station. Some set up the postpartum cart. You eat together, you laugh, and you end the day genuinely more prepared than you were.

      It does not have to be formal.

      It does not need a theme, invitations, balloon arches, matching outfits, or a Pinterest aesthetic.

      It just needs willing hands and a clear list of what actually needs doing.

      That list is what this post is.


      Why a nesting party might be more useful than a baby shower

      Baby showers are lovely. I am not against them.

      But they tend to produce a lot of things and not a lot of done.

      You leave a shower with onesies, a beautiful nappy bag, a wipe warmer, and twelve tiny blankets.

      You do not usually leave with:

      • a stocked freezer
      • a ready postpartum cart
      • washed baby clothes
      • a feeding station
      • diapers and wipes already organised
      • a Subscribe & Save setup
      • meals labelled and frozen
      • a hospital-home setup that actually works

      The nesting party fills the gap between what you received and what you actually need.

      If you can only choose one, ask for help before the baby comes.

      The gifts can wait.

      The preparation cannot.


      Free printable: Nesting Party Checklist

      I made a simple two-page Nesting Party Checklist you can send to the people who keep asking how they can help.

      It includes the practical tasks that actually matter before baby arrives:

      • postpartum cart setup
      • feeding station setup
      • freezer meals
      • diaper station
      • baby laundry
      • Subscribe & Save essentials
      • household reset tasks

      Get the free Nesting Party Checklist

        We respect your privacy. Unsubscribe at anytime.

        No Spam. Just practical postpartum and baby-prep resources from Mama Rooted.

        Download the free Nesting Party Checklist and send it to your helpers before your due date.


        Quick Shop: What Helpers Can Set Up Before Baby Arrives

        Use this section as your shopping shortcut before the nesting party.

        Postpartum Cart Essentials

        Feeding Station Essentials

        Freezer Meal Prep Supplies

        Subscribe & Save Staples

        1. Set up the postpartum cart before you leave for the hospital


        If there is one thing to get done before your due date, it is this.

        Your postpartum cart should be fully stocked and sitting in the room where you will spend most of your time before you go into labour.

        When you come home from the hospital, you will not have the energy or headspace to set anything up.

        The version of you that exists right now — third trimester, nesting, still somewhat functional — is the one who should be doing this.

        Ask a helper to assemble and stock:

        The secret is not just having the cart.

        It is giving everything a home before you are trying to find it one-handed in the dark.

        I have a full tier-by-tier breakdown with everything linked in my postpartum cart post if you want the complete list.


        2. Set up the feeding station

        Whether you are breastfeeding, formula feeding, or combo feeding, set up a dedicated feeding spot before the baby arrives.

        You will spend more time there than you think.

        Ask a helper to set up:

        This is not about making a cute corner.

        It is about not having to stand up while holding a hungry baby, sore body, and half-open robe.


        3. Prep freezer meals — the gift that lasts three months

        Ask people to bring food, not flowers.

        My mother-in-law spent two days before my due date cooking and freezing food. Dal, khichdi, parathas, soups.

        I ate from that freezer for six weeks.

        It was one of the most practical forms of care I received.

        Ask people to prep and freeze:

        • Dal or lentil soup — freezes perfectly and reheats quickly
        • Soups and broths — especially vegetable broth or bone broth
        • Pasta sauces — batch-cooked and frozen in portions
        • Overnight oats — five jars ready for the week
        • Energy balls or lactation bites — oats, nut butter, dates, chocolate chips
        • Parathas or rotis — layered and frozen
        • Khichdi packs — rice, dal, spices portioned together
        • Glass meal prep containers — labelled with contents and reheating instructions
        • Freezer labels or label maker — so you can find food without thinking

        My rule for postpartum meals:

        Keep it simple.

        Simple gets eaten.


        4. Wash and organise baby clothes

        This is one of those tasks that sounds sweet until you are nine months pregnant, folding tiny sleeves, and wondering why a newborn owns more laundry than you do.

        Ask someone to:

        • wash newborn and 0–3 month clothes
        • separate zip sleepsuits from daytime outfits
        • fold burp cloths and muslins
        • sort by size
        • remove tags
        • put complicated outfits somewhere low priority
        • place easy zip sleepsuits where they are easiest to grab

        The goal is not a perfect nursery drawer.

        The goal is being able to find a clean zip sleepsuit at 3am without turning on the big light.


        5. Set up the diaper station

        You need diapers and wipes in more than one place.

        At minimum, set up:

        • bedroom changing area
        • living room basket or caddy
        • diaper bag
        • postpartum cart

        Ask a helper to stock:

        • diapers in multiple sizes
        • wipes
        • diaper cream
        • changing mat
        • disposable bags
        • spare onesies
        • burp cloth
        • hand sanitiser

        Also ask someone to check that you did not only buy newborn diapers.

        Babies grow out of them fast.

        Register for size 1 and size 2 as well.


        6. Set up Subscribe & Save before the baby comes

        This one sounds small.

        It is not.

        Ask someone tech-comfortable — your partner, sibling, friend — to sit with you and set up automatic deliveries for things you will use constantly.

        The goal is to remove these items from your mental checklist entirely.

        What to subscribe to:

        Subscribe & Save usually gives a small discount, but that is not the main benefit.

        The real benefit is not having to remember one more thing.

        A few minutes of setup now saves months of:

        “We’ve run out.”

        At the worst possible moment.


        7. Set up the “mama needs this too” basket

        A nesting party should not only prepare the baby’s things.

        You are coming home from the hospital too.

        Ask someone to make a small basket for the places you will sit most often.

        Add:

        The baby’s needs will be obvious.

        Yours are the ones that disappear unless someone makes space for them.

        Make space before you are too tired to ask.


        8. What not to ask guests to do

        A nesting party works because everyone knows their role.

        Here is what I would keep off the list.

        Do not ask people to deep-clean

        A light tidy is fine.

        Deep cleaning is exhausting and most guests are not comfortable scrubbing someone else’s bathroom.

        Do not ask for advice

        A nesting party is for doing, not debating.

        The moment it becomes a parenting opinions session, it stops being useful.

        Do not try to get everything done in one session

        Pick the highest-impact tasks first:

        • postpartum cart
        • freezer meals
        • feeding station
        • baby laundry
        • diaper station

        The rest can wait.

        Do not skip the food

        Feed your helpers.

        Make it a gathering, not a work party.

        People help more and better when they feel appreciated.


        The honest reason this matters

        I did not have a formal nesting party.

        But I had people who showed up, asked what I needed, and then actually did it.

        Coming home from the hospital to a prepared space — a stocked cart, a full freezer, a feeding station already set up — meant I could spend my first weeks focusing on my daughter and my recovery instead of logistics.

        That is the whole point.

        If you have people willing to help, tell them specifically what to do.

        Use this list.

        Print the checklist.

        Let people take things off your plate before the plate gets full.

        The baby does not care whether the house is perfect.

        She cares whether her mama is held, fed, and not carrying every tiny thing alone.

        Everything else is in service of that. Lots of love, Mama Rooted.


        Get the free Nesting Party Checklist

          We respect your privacy. Unsubscribe at anytime.

          No Spam. Just practical postpartum and baby-prep resources from Mama Rooted.

          📥 Download the free Nesting Party Checklist — a printable one-page list to share with your helpers before your due date.

          📌 Save this and share it with every third-trimester mama you know.