Tag: motherhood

  • Postpartum Body Changes Nobody Warns You About (What’s Normal, What Helped, and What I Wish I’d Known)

    Postpartum Body Changes Nobody Warns You About (What’s Normal, What Helped, and What I Wish I’d Known)

    ⚠️ Affiliate disclosure: This post contains affiliate links. I may earn a small commission at no extra cost to you.


    Nobody warned me.

    Not really.

    There were books. There were birth classes. There were endless conversations about labour, contractions, cervical dilation, and what to pack in a hospital bag.

    And then she arrived.

    A few days later I found myself standing in the shower staring at my feet because my ankles had completely disappeared.

    A week later I woke up drenched in sweat and convinced I had a fever.

    A few days after that I sat on the edge of my bed crying because I couldn’t work out whether I was overwhelmed, exhausted, hormonal, or all three.

    Every symptom felt alarming because nobody had told me it was coming.

    Nothing was wrong.

    My body was doing exactly what postpartum bodies do.

    I just didn’t know that yet.

    This is the post I wish someone had handed me before I gave birth — the honest version of what actually happens to your body after delivery, what’s normal, what helped me, and the things I’d buy before baby arrives if I had to do it all again.

    Top 5 product takeaways from this post.


    Postpartum Bleeding (Lochia): What’s Normal?

    You know there will be bleeding after birth.

    What most people don’t tell you is how much, how long, and how dramatically it changes.

    The first time my bleeding changed colour, I genuinely wondered whether something had gone wrong.

    It hadn’t.

    Lochia moves through three stages.

    Lochia Rubra (Days 1–4)

    Bright red.

    Heavy.

    Honestly, a little shocking.

    This is blood, mucus, and uterine lining leaving your body.

    Maternity pads only.

    No tampons.

    Change them regularly.

    Lochia Serosa (Days 4–10)

    Pink or brown.

    Much lighter.

    This stage catches a lot of new mums off guard because nobody tells you the colour changes.

    Lochia Alba (Days 10–42)

    Yellowish-white discharge.

    Less dramatic.

    Still completely normal.

    When to call your doctor

    Call your healthcare provider if:

    • bright red bleeding returns after it had lightened
    • you pass clots larger than a golf ball
    • the discharge develops a strong smell
    • you develop a fever

    These can indicate infection or retained placental tissue and should be checked promptly.

    What helped me

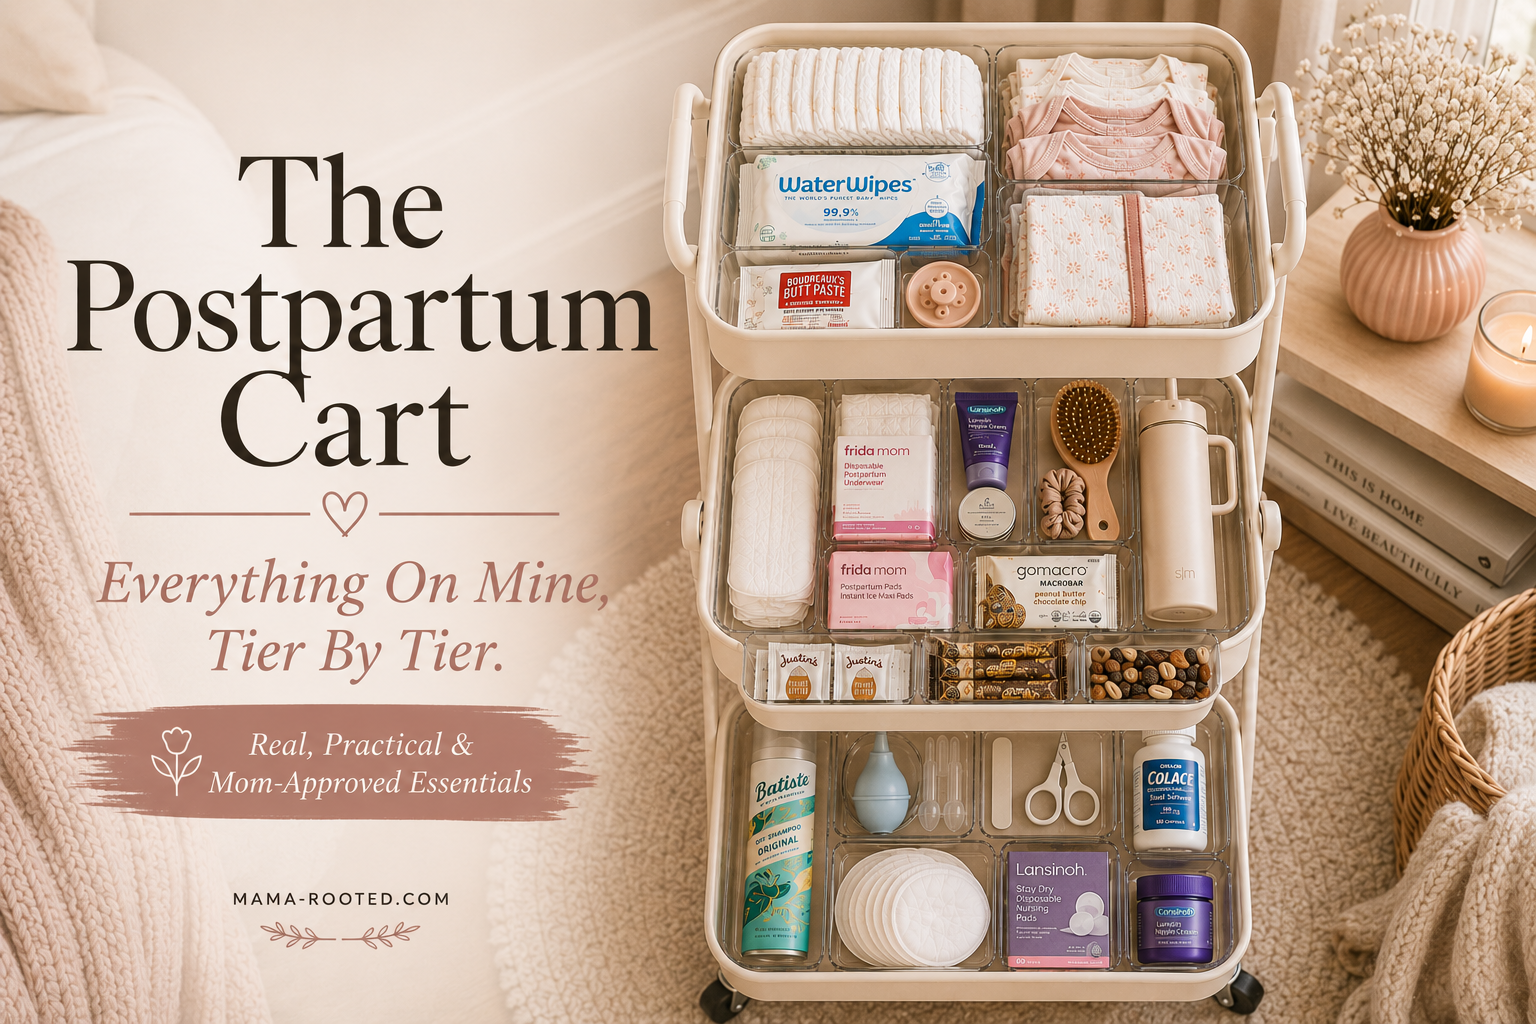
    The Frida Mom Postpartum Recovery items were the products I was most grateful to have waiting at home.

    The peri bottle alone was worth it.

    For the first week, I actually preferred disposable postpartum underwear to pads. I wasn’t expecting that. They felt more secure, more comfortable, and removed the constant worry about leaking through clothes or sheets.

    Nobody tells you to buy adult nappies before birth.

    I’m telling you now.


    Afterbirth Cramps During Breastfeeding

    I genuinely thought contractions ended once labour was over.

    They don’t.

    For the first few days, every time she latched, I felt cramping in my uterus.

    This is oxytocin — the same hormone that causes labour contractions — being released during breastfeeding to help your uterus contract back to its pre-pregnancy size.

    It is a good thing.

    It is also uncomfortable, particularly in the first two or three days when it’s strongest.

    A cordless heating pad became one of my most-used postpartum purchases.

    Being able to place warmth directly across my lower abdomen during feeds made a noticeable difference.

    Also sore breasts and raw nipple are real. Just cannot thank the breast therapy pads and the nipple cream enough for getting me through that first week.


    Postpartum Night Sweats

    Mine weren’t dramatic.

    I wasn’t changing sheets three times a night.

    But I was waking up damp, confused, and wondering why I suddenly felt like I was sleeping through a heatwave.

    Postpartum night sweats happen because your body is rapidly getting rid of excess pregnancy fluid while your hormones are simultaneously crashing.

    In other words:

    your body is doing housekeeping.

    The timing just happens to be terrible.

    You are already exhausted.

    You are already awake.

    And now you’re sweaty too.

    Most postpartum night sweats improve within the first few weeks.

    What helped me

    • Cotton pyjamas
    • Bamboo sleepwear
    • A cracked window
    • A second pair of pyjamas beside the bed

    The second set was the game changer.

    No searching.

    No waking yourself up further.

    Just change and get back into bed.


    Postpartum Swelling in Feet and Legs

    This was the symptom that scared me most.

    Not the bleeding.

    Not the cramps.

    The swelling.

    I remember looking down in the shower and feeling like my feet belonged to someone else.

    Your body retains enormous amounts of extra fluid during pregnancy.

    After birth it has to redistribute and remove that fluid.

    While that’s happening, gravity tends to send it straight to your feet and ankles.

    The swelling often peaks around days two to five postpartum.

    Then gradually improves.

    What helped

    • Walking gently
    • Drinking water
    • Elevating my feet
    • Compression socks

    If I had another baby tomorrow, compression socks would already be sitting in my hospital bag.


    The Hormonal Crash Nobody Talks About

    This deserves its own section.

    Because it wasn’t the bleeding.

    Or the swelling.

    Or the sweating.

    This was the hardest part.

    A few days after birth I found myself questioning everything.

    Was she okay?

    Was I okay?

    Was I doing any of this right?

    Would I ever feel like myself again?

    The baby blues are real.

    They are hormonal.

    They are common.

    And they do not mean you are failing.

    For most mums they peak around days three to five and improve within two weeks.

    If they don’t improve—or if they get worse—please reach out to your healthcare provider.

    You do not need to suffer through it alone.


    Postpartum Body Odour

    Nobody warned me about this either.

    You can smell different postpartum.

    Stronger.

    Sweatier.

    Less familiar.

    It’s caused by hormonal changes and increased sweat production.

    It’s temporary.

    It’s normal.

    And it isn’t a hygiene issue.

    It’s biology.


    Pelvic Floor Recovery

    Nobody told me things would feel different.

    Not just sore.

    Different.

    Heavier.

    Less coordinated.

    The pelvic floor has carried a baby for nine months and, for many women, stretched significantly during birth.

    Recovery takes time.

    For me, gentle diaphragmatic breathing was the first thing that helped me reconnect with my body.

    Not intense exercise.

    Not rushing recovery.

    Breathing.

    That surprised me.

    The second step was the MUTU program that immensely helped with my diastasis recti and pelvic floor strengthening.

    It was the anchor I needed when I was overwhelmed with getting back to movement content on the internet.


    Postpartum Hair Loss Is Coming

    Maybe not today.

    Maybe not this month.

    But probably around month three.

    One morning I brushed my hair and thought:

    “That can’t be normal.”

    It was.

    Pregnancy hormones keep hair in its growth phase.

    After birth, those hairs catch up all at once.

    The result looks dramatic.

    But it is temporary.

    And it does end.


    What I’d Buy Before Birth

    If I could go back and prepare one postpartum basket before delivery, it would contain:

    • Frida Mom Recovery Kit
    • Disposable postpartum underwear
    • Cordless heating pad
    • Compression socks
    • Two sets of breathable pyjamas
    • Postnatal vitamins
    • Magnesium glycinate (with doctor approval)
    • A written list of people to call when I needed support

    The Thing I Most Want You to Remember

    Your postpartum body is not broken.

    It is not failing.

    It is healing.

    The bleeding is healing.

    The cramping is healing.

    The sweating is healing.

    The swelling is healing.

    Even the emotional chaos is your body trying to find its way back to balance.

    The products helped.

    But what helped most was understanding what was happening.

    Because once I knew my body wasn’t failing, I stopped being afraid of it.

    And if you’re reading this in the middle of the night wondering whether what you’re experiencing is normal, I hope this post gives you the same reassurance I needed.

    You’re not broken.

    You’re recovering.

    And that’s a very different thing.

    Lots of love,

    Mama Rooted

    Read Next

    If you’re in your first week postpartum

    → My Honest Postpartum Recovery Must-Haves

    If your hair has started shedding

    Postpartum Hair Loss – What it is and How I managed it

    If you’re ready to start healing

    Getting back to movement after Birth – slowly and safely

    If you want a traditional recovery approach

    Jaapa – The 40 Day Indian Postpartum Recovery Tradition

  • The Best Diaper Bags of 2026 — What We’d Actually Carry at Every Budget

    The Best Diaper Bags of 2026 — What We’d Actually Carry at Every Budget

    Affiliate disclosure: This post contains affiliate links. I may earn a small commission at no extra cost to you. All recommendations are based on independent research and real parent feedback.

    Choosing the right diaper bag can make everyday life with a baby dramatically easier.

    It’s one of the most-used pieces of baby gear you’ll own, going everywhere from doctor visits and daycare drop-offs to road trips and flights. A good diaper bag keeps everything organized, easy to reach, and comfortable to carry. A bad one becomes a daily frustration.

    When you’re leaving the house with a baby, the last thing you want is to dig through a messy bag looking for wipes while your little one is melting down. A good diaper bag won’t magically make parenting easier, but it can make those everyday moments feel a lot less stressful.

    After reviewing expert recommendations, editorial testing, and thousands of parent reviews, these are the diaper bags we’d genuinely recommend in 2026.

    Whether you’re looking for a budget-friendly backpack, a stylish everyday bag, or a premium option you’ll still use years after the diaper stage, you’ll find a great fit here.


    Quick Picks: Which Diaper Bag Is Right for You?

    CategoryOur PickBest For
    Best OverallJuJuBe ClassicParents looking for the best balance of organization, style, durability, and long-term value
    Best Budget PickAstro Alan Diaper Bag BackpackParents who want the most features without spending over $50
    Best for OrganizationItzy Ritzy Boss PlusParents who love designated pockets and structured storage
    Best LooksPetunia Pickle Bottom Boxy Backpack

    Freshly Picked Diaper Bag
    Families who want a diaper bag that doubles as a travel bag
    Best Long-Term ValueSkip Hop FormaBudget-conscious parents looking for proven durability
    Best Premium Build QualityJuJuBe ClassicParents who prioritize durability, versatility, and warranty coverage

    What to Look For in a Diaper Bag

    Organization — Easy-access pockets matter more than having lots of pockets. You should be able to grab wipes, bottles, and essentials with one hand.

    Carry Modes — Backpack styles are usually the most practical, while convertible bags offer extra flexibility.

    Weight — Lightweight materials like nylon and neoprene are easier to carry once the bag is fully packed.

    Ease of Cleaning — Wipeable or machine-washable materials make a huge difference over time.

    Longevity — The best diaper bags can transition into travel, work, or everyday bags after the baby years.


    Our Top Diaper Bag Picks for 2026

    Keababies Original Diaper Bag Backpack — ~$39–$43

    Best For: Parents who prioritise one-handed zipper access above everything else.

    Keababies is one of the most-searched diaper bag brands on Amazon and consistently appears in the top 10 best-sellers in the category. The standout feature is exactly where it should be: the zippers. Keababies builds the entire bag around smooth, easy-glide zippers — getting a nappy in or out one-handed, with a baby on your hip, is not a fight here. It is one motion. That sounds small until you’ve had a bag whose zippers require two hands to open while she’s escalating.

    The honest caveat: independent testing by BabyGearLab found an off-gassing smell from the material for several weeks after unboxing — air it out before first use. Some units have also shown seam weakness at the insulated pockets over time. The Ruvalino has a stronger long-term durability track record; the Keababies is the better short-term daily carry for ease of access.

    Functionality: ⭐⭐⭐⭐ 4/5
    Ease of Use: ⭐⭐⭐⭐ 4/5
    Looks: ⭐⭐⭐⭐ 4/5

    Pros

    • Best zippers in this tier — smooth, easy-glide, genuinely one-handed
    • Insulated bottle pockets
    • Large waterproof changing pad included
    • Waterproof Oxford fabric, scratch-resistant
    • 365-day money-back warranty

    Cons

    • Off-gassing smell at unboxing — needs to be aired before use
    • Seam quality inconsistency reported in independent testing
    • Spot-clean only — no machine wash

    Choose the Keababies if:

    • One-handed zipper access is your top priority
    • You’re buying for medium term rather than expecting it to last multiple years

    Skip Hop Forma Backpack — ~$65–$79

    Best For: Budget-conscious parents who want a lightweight, reliable diaper bag.

    The Skip Hop Forma continues to be one of the strongest value picks in the diaper bag category. It includes two packing cubes, a changing pad, built-in stroller straps, and a wide-opening design that makes finding essentials easy.

    The lightweight nylon construction keeps it comfortable even when fully packed, making it a great choice for everyday outings. Parents consistently praise its durability and practical design.

    The main drawback is organization. While the included packing cubes help, the interior is more open than some competing bags.

    Functionality: ⭐⭐⭐⭐ 4/5
    Ease of Use: ⭐⭐⭐⭐⭐ 5/5
    Looks: ⭐⭐⭐⭐ 4/5

    Pros

    • Excellent value
    • Includes packing cubes
    • Lightweight and comfortable
    • Built-in stroller straps
    • Machine-washable lining

    Cons

    • Limited internal organization
    • Functional rather than stylish
    • Fewer pockets than premium options

    Choose the Skip Hop Forma if:

    • Longevity and durability matter more than aesthetics
    • You like having everything pre-organized before you leave the house
    • You have more than one child and want a bag that goes the distance
    • You prefer a bag that is lightweight and easy to carry for everyday outings

    Price: ~$65–$79


    Astro Alan Diaper Bag Backpack — ~$39 – $41

    Best For: Parents who want maximum features without spending over $50.

    The Astro Alan packs more features into a budget diaper bag than almost anything else in this guide. With multiple storage compartments, an insulated bottle pocket, changing station accessories, stroller straps, and a hidden valuables pocket, it delivers exceptional functionality for the price.

    Its understated backpack design works well for either parent and doesn’t immediately look like a diaper bag. That makes it especially appealing for families who share carrying duties.

    While feature-rich, it is slightly bulkier than the Skip Hop Forma and can feel heavier once loaded.

    Functionality: ⭐⭐⭐⭐⭐ 5/5
    Ease of Use: ⭐⭐⭐⭐ 4/5
    Looks: ⭐⭐⭐⭐ 4/5

    Pros

    • Outstanding feature set
    • Excellent value
    • Hidden valuables pocket
    • Insulated bottle storage
    • Works well for both parents

    Cons

    • Slightly bulkier than competitors
    • Heavier when fully packed
    • Limited colour options

    Choose the Astro Alan if:

    • You want maximum features for the price
    • You like built-in organization
    • You’re creating a baby registry

    Itzy Ritzy Boss Plus Backpack — ~$137 – $190

    Best For: Parents who love organization and designated storage.

    If pockets are your love language, the Boss Plus is hard to beat. With extensive internal and external organization, insulated bottle pockets, a laptop sleeve, and a structured design that stays upright, everything has a place.

    The stylish puffer aesthetic helps it stand out from more traditional diaper bags, and many parents appreciate that it feels both functional and fashionable.

    The trade-off is weight. With so much storage space available, it’s easy to overpack.

    Functionality: ⭐⭐⭐⭐⭐ 5/5
    Ease of Use: ⭐⭐⭐⭐ 4/5
    Looks: ⭐⭐⭐⭐⭐ 5/5

    Pros

    • Exceptional organization
    • Multiple insulated pockets
    • Structured design stays upright
    • Laptop sleeve included
    • Stylish appearance

    Cons

    • Premium price
    • Can become heavy when loaded
    • Spot-clean only

    Choose the Itzy Ritzy Boss Plus if:

    • You love having a place for everything
    • Organization reduces your stress
    • You’re willing to pay more for convenience

    Petunia Pickle Bottom Boxy Backpack — ~$199

    Best For: Parents who want a bag that genuinely doesn’t look like a diaper bag.

    The Petunia Pickle Bottom Boxy Backpack is the bag consistently cited by Forbes, BabyGearLab, WhatToExpect, and NBC Select as the go-to for parents who care about aesthetics without sacrificing function. The front flap design and muted leatherette finish reads as a stylish work bag or weekend backpack from the outside. Inside, you get a built-in changing station that unfolds from the front, multiple organizational pockets, and multiple carry configurations — backpack, shoulder, and stroller-attached.

    The glazed coated canvas fabric repels liquids and dirt — wipe-clean maintenance rather than machine wash, which works once you accept that.

    For working mamas who want one bag that transitions from daycare drop-off to a coffee meeting without announcing itself as a diaper bag — this is the pick.

    Functionality: ⭐⭐⭐⭐⭐ 5/5
    Ease of Use: ⭐⭐⭐⭐ 4/5
    Looks: ⭐⭐⭐⭐⭐ 5/5

    Pros

    • Best-looking bag in this tier — genuinely doesn’t read as a diaper bag
    • Built-in changing station unfolds cleanly from the front
    • Multiple carry configurations — backpack, shoulder, stroller
    • Glazed coated canvas repels spills and dirt easily
    • Structural design stays upright

    Cons

    • Wipe-clean only — not machine washable
    • More expensive than the Boss Plus
    • The unique aesthetic is either exactly what you want or not your style at all
    • Limited Amazon stock consistency compared to Boss Plus — worth checking before buying

    Choose the Petunia Pickle Bottom Boxy if:

    • You care deeply about how your bag looks paired with your wardrobe
    • You want one bag for daycare drop-off and client meetings
    • You want a bag that doesn’t announce you have a baby

    Freshly Picked Classic Diaper Bag Backpack — ~$170–$200

    Best For: Parents who want a premium-looking bag that transitions beautifully to everyday use.

    Freshly Picked is the brand that consistently appears on “best-looking diaper bags” lists — and having read through the reviews, the aesthetic case is strong. The vegan leather exterior and clean silhouette reads as a premium everyday backpack rather than a baby product. The wipeable surfaces and 10 pockets including two insulated ones cover the functional requirements. It converts between backpack, crossbody, and tote via a detachable shoulder strap. Changing pad included.

    The honest note – The vegan leather exterior, while beautiful, requires more care than the waterproof nylon competitors in this tier. This is the bag you buy if you want something that looks elevated; the JuJuBe is the bag you buy if long-term durability is the priority.

    Functionality: ⭐⭐⭐⭐ 4/5
    Ease of Use: ⭐⭐⭐⭐ 4/5
    Looks: ⭐⭐⭐⭐⭐ 5/5

    Pros

    • Most elevated aesthetic in this guide — genuinely premium look
    • Converts between backpack, crossbody, and tote
    • Wipeable vegan leather exterior
    • 10 pockets including two insulated
    • Changing pad included
    • Top stroller hook handle
    • Transitions naturally to everyday carry

    Cons

    • Fewer pockets than the JuJuBe
    • Vegan leather requires more care than waterproof nylon
    • No machine wash — wipe-clean only
    • No lifetime guarantee

    Choose the Freshly Picked if:

    • Aesthetics are your number one priority
    • You want a bag that transitions immediately to everyday carry after the diaper years
    • You’re prepared to take care of the vegan leather material properly

    JuJuBe Classic Convertible Diaper Bag — ~$200

    Best For: Parents who prioritize durability, organization, and versatility.

    The JuJuBe Classic earns its reputation through exceptional build quality and thoughtful design. It offers multiple carry modes, strong internal organization, durable hardware, and machine-washable materials.

    Parents who value function over fashion often gravitate toward the JuJuBe because it simply performs well day after day.

    While the aesthetic is more obviously “diaper bag” than some competitors, its durability and versatility are among the best available.

    Functionality: ⭐⭐⭐⭐⭐ 5/5
    Ease of Use: ⭐⭐⭐⭐⭐ 5/5
    Looks: ⭐⭐⭐⭐ 4/5

    Pros

    • Excellent organization
    • Multiple carry options
    • Durable construction
    • Machine washable
    • Strong warranty support

    Cons

    • Premium pricing
    • More traditional diaper bag appearance
    • Slightly heavier than some competitors

    Choose the JuJuBe Classic if:

    • Durability is your top priority
    • You want multiple carry options
    • You value long-term reliability

    Quick Comparison

    BagPriceBest ForWashable
    Skip Hop Forma~$70Best ValueYes
    Astro Alan~$40Best Budget FeaturesYes
    Itzy Ritzy Boss Plus~$150Best OrganizationSpot Clean
    Petunia Pickle Bottom~$199Best LooksSpot Clean
    Freshly Picked~$179Best LooksSpot Clean
    JuJuBe Classic~$200Best DurabilityYes

    Final Recommendation

    If you’re looking for one diaper bag that has best-tested organization, the most versatile carry system, and the security of a lifetime guarantee, the JuJuBe Classic is my top pick for 2026.

    Its machine-washable construction, thoughtful organization, laptop sleeve, and travel-friendly design make it one of the few diaper bags that remains useful long after the diaper stage.

    For families on a tighter budget, the Astro Alan offers the strongest feature set under $50, while the Skip Hop Forma remains one of the safest budget-friendly choices for everyday use.


    Save This Guide For Later

    Whether you’re building your baby registry, replacing a diaper bag that isn’t working, or shopping for a practical gift for new parents, save this guide for future reference.

    The best diaper bag is the one that fits your family’s daily routine—and hopefully this comparison has made that decision a little easier.

    Lots of love,

    Mama Rooted

    Also on Mama Rooted

    Travelling with a baby 0–6 months — what actually made it work

    What actually goes in the diaper bag — and what you can leave at home

    The Best Travel Strollers of 2026 – What we would actually buy at every budget

    Top Diaper Bag picks for moms in 2026
  • Road trips with a baby — what we actually packed and the few things that made all the difference

    Road trips with a baby — what we actually packed and the few things that made all the difference

    ⚠️ Affiliate disclosure: This post contains affiliate links. I may earn a small commission at no extra cost to you.


    Our first road trip with her felt like preparing for an expedition.

    I packed far too much, worried about everything, and was convinced we’d end up turning around halfway through.

    Instead, the trip was mostly fine.

    Not because we had every gadget. Because we had a few things in the right places.

    That’s the lesson I wish someone had given me before our first long drive with a baby. You don’t need half the travel products marketed to parents. You need a handful of things that solve real problems before they happen.

    These are the road trip baby essentials that genuinely earned their place.

    For mamas in a hurry, you can check out my absolute essentials for smooth road trips on my Amazon storefront or keep reading for detailed recommendations on all the products we honestly felt made a difference.


    The single setup change that transformed every road trip

    Before I recommend anything else, I would buy a car seat back organiser.

    Ours hangs from the passenger seat headrest, facing the back seat.

    Everything she might need while we’re moving lives there:

    • wipes
    • two spare diapers
    • Small toy / teether
    • muslin cloth
    • snack pouch
    • 1 disposable bag
    • Activity book / Textured book

    One glance and I know exactly where everything is.

    No unzipping the diaper bag.

    No rummaging in the footwell.

    No pulling over because I can’t find the wipes while she’s escalating.

    I realised how important this was somewhere on a motorway when she started crying, I needed wipes, and I genuinely couldn’t remember which of the three bags they were in. By the time I’d found them, she was fully upset and we were pulling over anyway.

    After that trip, everything moved into the organiser.

    The Helteko Car Back Seat Organiser has multiple compartments, cup holders and mesh pockets — enough to keep all the essentials accessible without taking over the whole car.

    One rule:

    Car boot Organizer

    The second part of the setup was the car boot organizer that made pit stops easier to manage and not turn into a full blown packing unpacking moment.

    It helped us stay organized and ensure that we have got everything. Every compartment had things meant to be kept there so it was much much easier to do a final checklist check before leaving home just by looking at the organizer.

    Oh no we forgot the favorite toy is probably the worst nightmare on a road trip and we preferred to skip that altogether.


    If you buy only 5 things from this post

    If you’re trying to keep spending down, these are the five items I’d prioritise:

    1. Car seat organiser — the biggest difference-maker by far.
    2. Window shades — cooler car, easier naps.
    3. Hatch Go — familiar sleep cue anywhere.
    4. Portable changing mat — turns any stop into a changing station.
    5. Ergobaby carrier — faster and easier than unloading a stroller at every stop.

    Everything else is helpful.

    These five changed the experience.


    The sleep setup — because a sleeping baby is a successful road trip

    Most of our longer drives happened during nap time.

    The things that helped:

    Window shades

    Window shades helped keep the back seat cooler and blocked the bright sunlight that often kept her from settling when she was already tired.

    We used the magnetic stretch to fit window shades to cover maximum area and they worked very well to keep the heat outside.

    Simple. Cheap. Effective.

    Hatch Go

    The same white noise she associates with sleep at home travelled with us.

    The Hatch Go clips onto the headrest nearest her car seat.

    That familiarity mattered more than I expected.

    The sleep cue travels.

    Car naps became easier.

    Hotel naps became easier.

    New environments felt less new.


    The feeding setup on the road

    Momcozy portable milk chiller

    For pumping mamas, this changed everything.

    No hunting for a fridge.

    No worrying about how long milk had been sitting in the car.

    The Momcozy Portable Milk Chiller kept milk cold for hours and removed an entire category of stress.

    Portable Milk Warmer

    If you have pumper milk / formula in the chiller, you will need to warm it up and this portable bottle warmer is a lifesaver in these trips.

    Keep it accessible.

    Avoid unnecessary stops.

    One-handed snacks for you

    Dates.

    Trail mix.

    Protein bars.

    Anything requiring zero preparation.

    Driving with a baby is surprisingly draining.

    Your blood sugar crashing at hour three is not the moment you want to be problem-solving.


    The nappy change setup

    The boot becomes your changing station.

    Set it up before you leave.

    Portable changing mat

    Flat, foldable, wipe-clean.

    Always in the car.

    Diaper disposal bags

    One of the least glamorous and most useful road trip hacks.

    Perfect for sealing dirty nappies until you reach a bin.

    Wet bag

    Because a motorway blowout is not a question of if.

    Only when.

    Keep a dedicated wet bag ready for clothes.

    Pre-assembled changing pouch

    Inside:

    • one nappy
    • wipes
    • cream
    • spare vest

    Grab one pouch.

    Don’t unpack the whole bag.


    The Safety setup

    It’s worth noting that the most important thing when travelling with an infant is safety. As such a safe and secure car seat and a baby monitor were of utmost priority.

    I cannot recommend the Graco car seat enough. Its safe, durable, easy to install and so comfortable for my daughter.

    We chose the infant rear facing car seat but their convertible car seat that extends to toddlerhood has equally great reviews.

    We also used a car baby monitor to ensure she was comfortable during long stretches and when she fell asleep.

    The power bank I didn’t know I’d need

    A fully charged power bank now lives permanently in the organiser.

    Not glamorous.

    Probably the most-used item after the wipes.

    One dead phone can mean:

    • no maps
    • no white noise
    • no hotel booking details
    • no emergency contact information

    Worth carrying.


    Entertainment for when she’s awake

    Car seat toys

    Soft sensory toys attached to the seat.

    Crinkle textures.

    Mirrors.

    Different fabrics.

    Simple is enough.

    The empty bottle hack

    An empty water bottle has saved more journeys than several expensive toys combined.

    I know how ridiculous that sounds.

    Try it.

    Familiar music

    We used the same playlist we played at home during bedtime and feeds.

    Familiar sounds regulate babies just as effectively as familiar places.

    When nothing else worked, the familiar songs usually helped.


    The Ergobaby for every stop

    At every stop, the stroller stayed in the boot.

    The Ergobaby Omni Classic went straight on instead.

    No unfolding.

    No manoeuvring through crowded service stations.

    No extra hassle.

    She went in the carrier.

    I kept both hands free.

    We were back in the car ten minutes later.

    For road trips specifically, the carrier was more useful than the stroller almost every time.


    The quick road trip packing list

    In the car seat organiser

    • wipes
    • one spare nappy
    • Small Toy / Teether
    • muslin Cloth
    • 1 disposable bag
    • snack pouch
    • Activity book / Textured book

    In the boot

    • portable changing mat
    • pre-packed changing pouch
    • wet bag
    • dog poo bags
    • spare outfit × 2
    • travel first aid kit

    Within reach in the front

    • water bottle
    • snacks
    • phone charger
    • power bank

    Sleep essentials

    • Hatch Go
    • window shades

    If breastfeeding or pumping

    • Momcozy portable milk chiller
    • Momcozy portable milk warmer
    • breast pads
    • pump

    Road trips with a baby are not the same as road trips without one.

    They’re slower.

    They’re more planned.

    And occasionally they’re derailed by something completely outside your control.

    But they’re also possible.

    And with the right setup, genuinely enjoyable.

    If you’re packing for your first road trip with a baby, start with the organiser.

    Not because it’s exciting.

    Because when the crying starts and you’re reaching for wipes with one hand and snacks with the other, you’ll know exactly where everything is.

    And that turns out to matter far more than having the perfect packing list.

    If you have questions about a specific type of trip or how we handled longer drives, I’m always happy to help.

    Lots of love,

    Mama Rooted


    📌 Save this for your first road trip with a baby — and send it to anyone packing for theirs.


    Also on Mama Rooted

    Travelling with a baby 0–6 months — what actually made it work

    What actually goes in the diaper bag — and what you can leave at home

    I tested a wearable breast pump for a month – here’s my honest take

  • Getting back to movement after birth — what I actually did, and the programme that helped me understand my body again

    Getting back to movement after birth — what I actually did, and the programme that helped me understand my body again

    ⚠️ Affiliate disclosure: This post contains affiliate links. I may earn a small commission at no extra cost to you. All recommendations are based on personal experience and genuine research.


    Nobody prepared me for what my body felt like after birth.

    Not weak, exactly. But different. Disconnected. Like the relationship I’d had with my core for my entire adult life had quietly been renegotiated while I was busy having a baby — and nobody had thought to tell me.

    I had spent nine months watching my body do something extraordinary. And then she arrived, and I was supposed to just… get back to normal. Except the core that had always been there wasn’t quite there anymore. And nobody was talking about it in terms I could actually use.

    I want to be very honest about something before I say anything else: the pressure to “bounce back” is one of the most damaging ideas in postpartum culture. It frames recovery as a race. It treats your body as something that needs to be corrected rather than supported. And it sets up a timeline that has nothing to do with what’s actually happening inside a postpartum body.

    This post is not about bouncing back. It’s about what I actually did — slowly, carefully, in my own time — to rebuild a relationship with a body that had worked incredibly hard and needed something different from me now.


    The first week — and why I started earlier than most people expect

    My gynaecologist was specific, which I was grateful for. Not “rest and wait,” but actual guidance: start gentle movements as soon as you feel ready. Begin with pelvic floor work and deep core breathing immediately — these are not exercises in the traditional sense. They’re reconnection.

    Around one week postpartum, when I could begin to make some sense of a routine, I started.

    Deep diaphragmatic breathing — breathing into the lower ribs and allowing the pelvic floor to release on the inhale and gently lift on the exhale. This is not Kegels. It’s not about squeezing as hard as possible. It’s about learning to breathe in a way that reconnects the breath, the deep abdominal muscles, and the pelvic floor into one coordinated system.

    Short gentle walks. Nothing that created pressure or heaviness. If something felt wrong, I stopped.

    This was the whole of week one.

    And it was enough.


    Six weeks — and the beginning of the next phase

    At six weeks my gynaecologist cleared me for more movement. Gentle yoga. Light exercise. Nothing high-impact yet. Nothing that loaded the core before it was ready.

    This is the phase where I think most postpartum mamas are most vulnerable — because the six-week check happens, the word “cleared” is used, and it’s very easy to interpret that as permission to just go back to how things were before.

    It isn’t.

    “Cleared” means it’s safe to progress. It doesn’t mean your pelvic floor and core are ready for whatever you put them through. It means the conversation about what comes next should start now.

    For me, the question was simple:

    How do I move from breathing exercises and gentle walks into something more structured — without accidentally doing too much too soon?

    That’s where the MUTU System came in.


    What the MUTU System actually is — honestly

    The MUTU System is a 12-week online program created by Wendy Powell, a certified postpartum exercise specialist. It was designed specifically for diastasis recti, pelvic floor dysfunction, and core rehabilitation after birth.

    The thing that set it apart for me was what it wasn’t.

    It wasn’t a postpartum fitness programme disguised as rehabilitation.

    It wasn’t about looking a certain way or losing weight.

    It wasn’t another version of bounce-back culture dressed up in softer language.

    The focus is functional strength, recovery, and rebuilding confidence in your body.

    The programme has two parts:

    MUTU Core — breathing, alignment, deep core activation, posture work, and pelvic floor rehabilitation.

    MUTU Intensive — progressive workouts that build on that foundation once your body is ready.

    You can begin the Core work very early postpartum and progress to the Intensives later with medical clearance.

    What I appreciated most was how slow the beginning felt.

    Actually, that frustrated me at first.

    The first two weeks repeat the same foundational work. I kept expecting the programme to move faster.

    But eventually I realised that was the point.

    Pregnancy changes the way the core functions. Birth changes it again. Before adding intensity, you need to rebuild communication between the breath, pelvic floor, and deep abdominal muscles.

    The early work feels simple because it’s foundational.

    And foundations are rarely exciting.

    They’re just important.


    What nobody told me about diastasis recti

    Most women have some degree of abdominal separation after birth.

    Most are never told.

    Diastasis recti is the separation of the left and right sides of the abdominal muscles along the connective tissue that runs down the centre of the abdomen. During pregnancy, that tissue stretches to accommodate your growing baby.

    For many women, some separation remains postpartum.

    The thing I wish more people explained is that the size of the gap isn’t always the most important factor.

    Function matters.

    A smaller gap with poor tension can cause more symptoms than a larger gap with good tension and support.

    Symptoms can include:

    • Lower back pain
    • Core weakness
    • A persistent “mummy tummy”
    • Pelvic floor dysfunction
    • A feeling of instability through the middle

    And certain exercises — particularly high-pressure movements introduced too early — can make symptoms worse.

    This is why the weeks between birth and returning to normal exercise matter so much.

    It’s not about avoiding movement.

    It’s about progressing intelligently.


    Can you start MUTU years after having a baby?

    One thing that surprised me while researching MUTU is how many women start long after the newborn phase.

    Diastasis recti, pelvic floor dysfunction, and core weakness don’t always disappear simply because time passes.

    Some women discover these issues six months postpartum.

    Some discover them six years postpartum.

    The programme isn’t designed only for newly postpartum mothers. It’s also intended for women who are still dealing with symptoms long after birth and want structured guidance on how to rebuild strength safely.

    If you’ve been told to simply “do more core work” but something still feels off, you’re not the only one.


    The evidence behind the programme

    This is where MUTU separates itself from many postpartum fitness programmes.

    A clinical survey of more than 900 women found:

    • 94% of women with diastasis recti reported improvement
    • 97% who previously struggled to engage their pelvic floor muscles could do so after three weeks
    • 92% of women experiencing urinary leakage reported improvement

    The programme has also been trialled within NHS settings and reviewed against standards including clinical efficacy, patient safety, and data compliance.

    Those numbers don’t guarantee results for every individual.

    But they do suggest that the programme is built on more than marketing claims.


    Who MUTU is genuinely for

    • Mamas in the early postpartum period who want structured guidance
    • Women dealing with diastasis recti
    • Anyone experiencing pelvic floor dysfunction, leaking, pressure, or prolapse symptoms
    • Mamas returning to exercise after birth who want a proper foundation
    • Women years postpartum who still feel disconnected from their core

    Who should consider other options or additional support

    • If your symptoms are mild and you’re already working with a pelvic floor physiotherapist, you may not need a structured programme
    • If your symptoms are severe, in-person assessment from a pelvic floor specialist should be your first step
    • If you know consistency is a challenge right now, be honest about whether you’ll realistically use the programme

    The honest tradeoffs

    No programme is perfect.

    The early weeks can feel repetitive.

    Because the content is pre-recorded, it cannot tailor itself to your specific presentation in the way an individual physiotherapist can.

    The pricing sits at around $28 per month or approximately $190 per year, though pricing can change over time.

    There is a 10-day free trial available, which is what I would recommend starting with.

    If you’re unsure, try the monthly option first before committing to a longer plan.


    What I want you to take away from this

    Your body after birth is not broken.

    It is not behind.

    It is not in need of correction.

    It is a body that has done something enormous and is now in a process of rebuilding.

    That process deserves patience, support, and guidance that respects what postpartum recovery actually looks like.

    The pelvic floor and breathing work I started in week one was not dramatic.

    It was quiet.

    Easy to underestimate.

    Almost invisible from the outside.

    But it built the foundation for everything that came after.

    And the MUTU programme gave me a structure for that transition period that I genuinely couldn’t have built for myself from random videos and free content online.

    Because I didn’t know what safe progression looked like.

    I am stronger now than I was before I had her.

    Not in a way that shows up in a before-and-after photo.

    In a way that shows up in how I move through my day.

    That, for me, is the whole point.

    If you have questions about any of this — where to start, whether MUTU might be right for you, or what my experience with specific stages was like — reach out.

    I’d genuinely be happy to help.


    📌 Save this for any mama who is wondering how to begin moving again — and wants the honest version, not the bounce-back version.

    Lots of love,

    Mama Rooted


    Also on Mama Rooted

  • Breastfeeding in the first week — what nobody warns you about

    Breastfeeding in the first week — what nobody warns you about

    Nobody warned me about the first week.

    Not the cluster feeding. Not the engorgement. Not the moment I would sit in the dark at 3am wondering if my baby was getting enough milk.

    Everyone talks about breastfeeding like it either works or it doesn’t.

    What nobody tells you is that the first week is often a crash course in sore nipples, second-guessing yourself, and learning to trust a process that feels anything but natural.

    This is the post I needed during those first seven days.

    And if you’re in the middle of it right now, I hope it helps you feel a little less alone.

    Before we get into the day-by-day experience, these are the products that genuinely helped me survive week one.

    ⚠️ Affiliate disclosure: This post contains affiliate links. I may earn a small commission at no extra cost to you.


    The 5 products that got me through the first week

    If you’re reading this from a hospital bed, a nursery chair, or the middle of a cluster-feeding marathon, these are the items I’d order first:

    If you are in a hurry, you can check out my complete list of breastfeeding essentials on Amazon here

    Now let’s talk about what the first week actually looked like.


    Day 1 — the first latch

    A nurse helped me with the very first latch and I am genuinely glad she was there.

    Because the mechanics of it — how to hold a newborn who is smaller and more fragile-feeling than anything you have ever held, how to position her without feeling like you might accidentally squish her, how to get enough of the breast in her mouth — none of that is intuitive when you are holding your baby for the first time.

    It didn’t feel right immediately. There was discomfort. I kept checking that her airways were clear — her little nose, her chin — convinced that I was somehow obstructing her even when I clearly wasn’t. That fear took about a day to ease.

    By day two something shifted. I found a position that worked for both of us. She settled into it. I relaxed slightly. And I started to understand that she was not as fragile as I was treating her — that her body knew how to do this even when mine wasn’t sure yet.

    What helped on day one: having a nurse present for the first latch. If you are in hospital, ask. If you are at home with a midwife, ask her to stay through the first feed. The first latch is not the moment to figure it out alone.


    Day 2–3 — colostrum, and the thing nobody mentions enough

    In the first two to three days, before your milk comes in, you produce colostrum. It is thick, golden, and comes in small amounts — sometimes just drops.

    This is the part where most first-time mamas panic, because it looks like almost nothing. Her stomach is the size of a marble. Colostrum is exactly what she needs. The drops are enough.

    Then around day three, the milk comes in. And when it does — you know.

    My breasts swelled overnight. They were hard, hot, and painful to touch in a way I had not expected. The engorgement was real, and it was uncomfortable enough that I was actually scared to feed — which is exactly the wrong response, because feeding is what helps.

    The initial let-down was a sharp, hot pang that took my breath away for the first few seconds of each feed. And then it passed, and feeding itself was fine. That distinction — sharp pain at let-down that eases, versus pain that persists throughout — is important. The former is engorgement and let-down adjusting. The latter is worth getting checked.

    What helped with engorgement: I used breast therapy pads — the kind you can warm up and use as a compress. The heat before a feed helped soften the breast enough to make the latch easier and took the edge off the soreness between feeds. Cold compresses after feeds helped with the swelling. Both made those days manageable when they would otherwise have felt impossible.

    These are small things that nobody puts at the top of the list. They should be.


    Days 3–5 — the nipple reality

    Raw nipples in the first week are real. I want to say that plainly because I think it gets softened in most breastfeeding content and then mamas are blindsided by how much it actually hurts.

    The skin on your nipples has never experienced this before. Even with a good latch — and ours was checked — the first days of feeding are an adjustment that your body has to go through physically. The soreness is normal. The rawness is common. And it does get better, but in the meantime you need to protect and heal the skin between every single feed.

    My holy grail combination was three things used together:

    Lansinoh HPA Lanolin Nipple Cream — applied after every feed without wiping off before the next one. Completely baby-safe. Creates a barrier that stops further damage from the air and friction between feeds.

    Earth Mama Organic Nipple Butter — deeply moisturising and soothing in a different way to lanolin. I alternated between the two depending on how the skin felt. The Earth Mama felt more like healing; the Lansinoh felt more like protection. I came to think of them as doing different jobs on the same nipple.

    Silverette silver cups — worn between feeds. Silver has natural antimicrobial properties and the cups protect the nipple from any contact with fabric, which in those early raw days matters more than you’d think. I cannot overstate how much difference these made between feeds.

    Use all three from day one. Not when it hurts. Before it hurts. Prevention in this case is significantly easier than recovery.


    Days 5–7 — cluster feeding and the confidence crisis

    This was the part that nearly broke me.

    Not physically.

    Mentally.

    By day five she was feeding constantly. On and off for hours every evening. I would finish a feed, settle her, sit down for what felt like thirty seconds, and she would want to feed again.

    And somewhere during those evenings a thought started repeating itself:

    Maybe she’s still hungry.

    Maybe I’m not making enough.

    Maybe my milk isn’t coming in properly.

    Nobody had warned me how convincing those thoughts would sound at 9pm after a day of feeding.

    What changed everything — practically and psychologically — was the Haakaa silicone pump.

    The Haakaa gave me reassurance when I needed it most
    Around the middle of the first week, I started using a Haakaa on the opposite side while nursing.

    I attached it to the opposite breast during feeds and one evening I looked down and saw it filling.

    There it was.

    Visible proof that my body was doing exactly what it was supposed to be doing.

    The milk wasn’t really the point.

    What surprised me was how much calmer I felt.

    I wasn’t collecting milk.

    I was collecting reassurance.

    Every drop sitting in that Haakaa was evidence that my body was working when my anxiety was telling me it wasn’t.

    That single moment quieted more doubt than any amount of reassurance from other people could have.

    It also built a small freezer stash without any additional pumping sessions, which in the first week when you have no spare time or energy is the only way a stash gets built.


    The feeding station — your single most important setup

    All of this — the engorgement, the cluster feeds, the soreness, the Haakaa, the nipple cream — happens while you are sitting somewhere. For hours. Repeatedly.

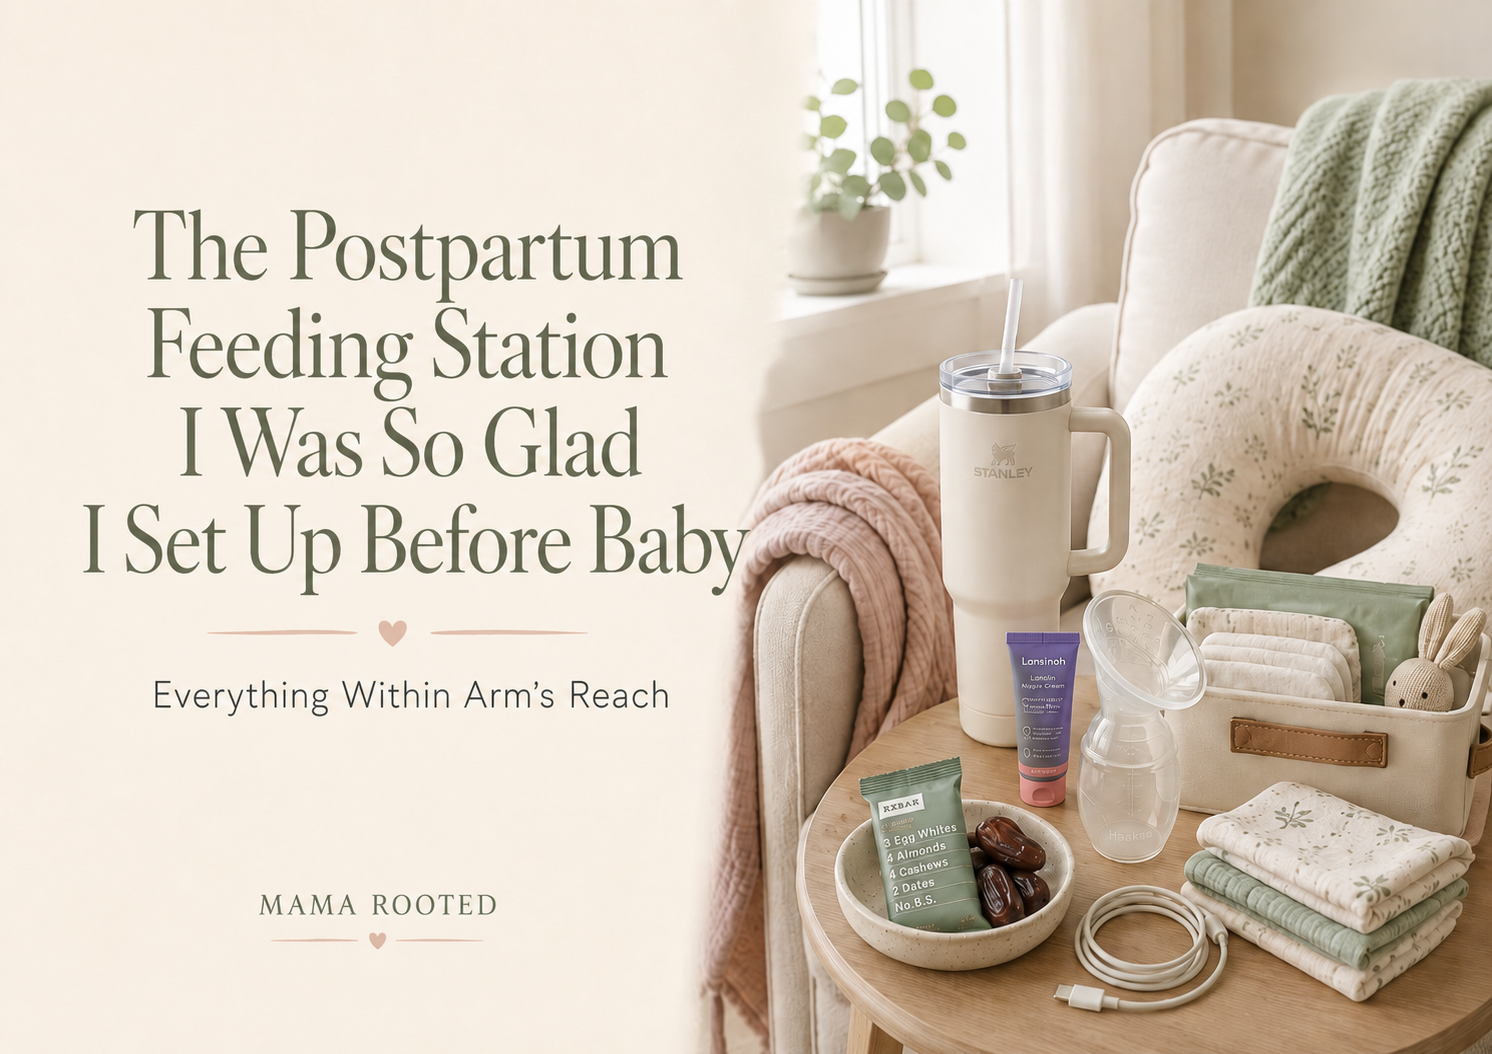
    Set up your feeding station before she arrives. Water — a large insulated bottle with a straw so you can drink one-handed. Snacks you can eat with one hand. Nipple cream within reach. Burp cloths stacked. Phone charger plugged in.

    I have a full post on exactly how to set up the feeding station — what goes where and why — here. If you haven’t read it yet, read it before the baby comes.


    The nursing pillow — not optional, not a luxury

    The nursing pillow — the thing my shoulders still thank me for

    Around day four my shoulders started hurting.

    Not a little.

    The kind of aching that comes from holding a tiny person in exactly the same position for hours every day.

    I realised I was using my arms to support her entire weight through every feed.

    The nursing pillow changed that immediately.

    Instead of bringing my body down to the baby, it brought the baby up to me.

    The difference in comfort was instant.

    I used the Boppy Original Nursing Pillow at every feed for months afterwards. By the second week, reaching for it had become automatic.


    When to call a lactation consultant

    If any of this is happening, call — do not wait:

    • Pain that persists throughout the entire feed, not just at let-down
    • Nipple pain that is getting worse after day five rather than better
    • Baby losing more than 10% of birth weight or not back to birth weight by day fourteen
    • Fewer than six wet nappies per day after day five
    • Engorgement that doesn’t ease with feeding or compression
    • You are not sure whether what you’re experiencing is normal

    You do not have to be in crisis to call a lactation consultant. A single appointment can resolve in one hour what weeks of uncertainty and pain cannot resolve alone. Find an IBCLC near you at ilca.org.


    Day 7 — where I was

    By the end of the first week I was a different person than I had been on day one.

    Not expert. Not effortless. But more in control. More aware of what my body was doing and why. The knowledge had accumulated — every feed teaching me something the one before hadn’t.

    The confidence I felt on day seven compared to day one was not because breastfeeding had become easy. It was because I understood it better. And understanding — the biology, the cluster feeding, the engorgement — made every hard moment feel manageable.

    That is the thing I most want to give you with this post. Not a perfect first week. But enough understanding that when the hard moments come, you know what they mean and you know they pass.

    You will find your position. She will find her latch. Your body will calibrate. It takes a week to begin to feel like something you are doing together rather than something happening to you.

    Stay with it if you can. And if you can’t — that is okay too. You are not your feeding method. You are her mother.

    If you are in week one right now and something doesn’t feel right, or you just need someone to tell you you’re doing fine — I’m at mama-rooted.com/contact. I mean it when I say I’m here.

    Lots of love,

    Mama Rooted


    📌 Save this for any mama in her first week of breastfeeding who needs the honest version. Lots of love, Mama Rooted.


    Also on Mama Rooted:

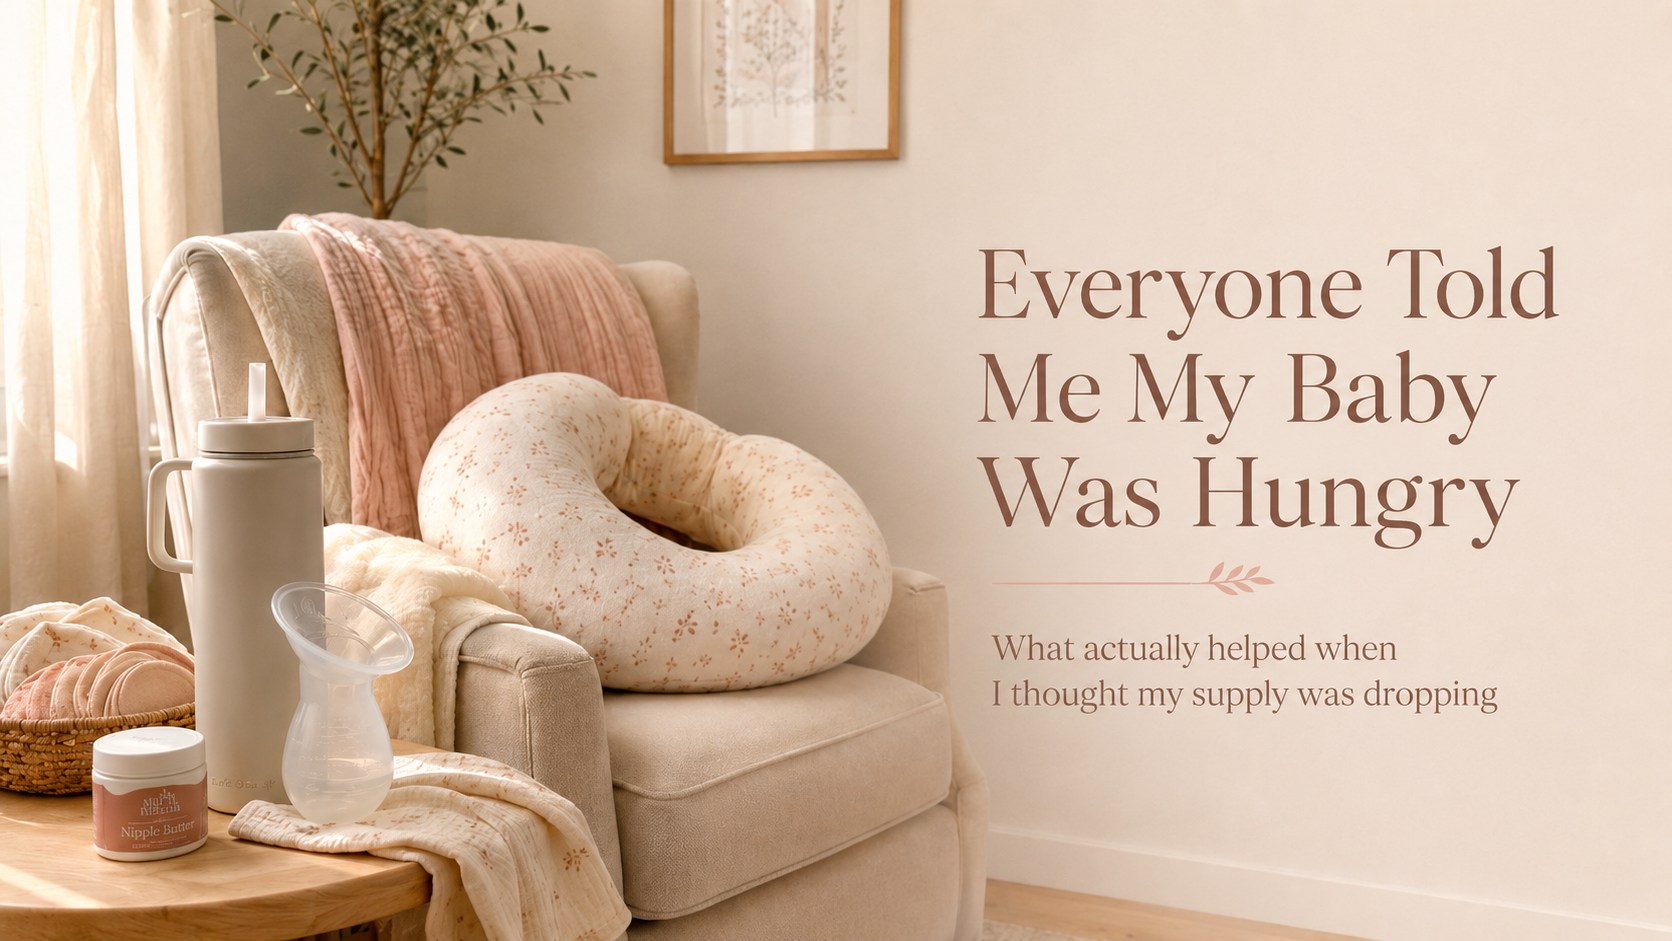
    My milk supply dropped and I thought I was failing — what actually happened

    The postpartum feeding station — everything within arm’s reach before you sit down

    I breastfed for two years — the honest truth about all of it

  • Baby Sleep Essentials — What We Actually Used, Including Through the 4-Month Regression

    Baby Sleep Essentials — What We Actually Used, Including Through the 4-Month Regression

    We never sleep trained.

    We co-slept, breastfed to sleep, and had a bedtime routine we kept every single night without exception. Our daughter now sleeps independently, says her affirmations before she falls asleep, and has done so since well before two.

    The sleep products that made the biggest difference were not complicated.

    They were dark.
    They were quiet.
    They were consistent.
    And they were in the right place at the right time.

    Here is everything we actually used.

    ⚠️ Affiliate Disclosure: This post contains affiliate links. As an Amazon Associate, I earn from qualifying purchases at no extra cost to you. I only recommend things I personally used or carefully researched.


    For moms setting up sleep in a hurry

    If you only want the short version, these are the things I would set up first:

    If I could only choose two things from this list, I would start with blackout curtains and the Hatch Rest+. The routine mattered most, but the room setup made the routine easier to repeat.


    The non-negotiables

    Blackout curtains

    Blackout curtains were completely non-negotiable for us from month two.

    Once a baby becomes more visually aware — which happens fast — any light in the room can become a sleep disruptor. A nap that was forty-five minutes becomes twenty. A night that was settled becomes fragmented. Morning light starts the day before anyone is ready.

    We used Deconovo Blackout Curtains because they were affordable, genuinely dark, and easy to hang.

    If you are only going to add one thing to the sleep setup right now, I would start here.


    White noise

    White noise was on all night, every night.

    Not a playlist.
    Not a fan we hoped would be loud enough.
    Consistent, low, steady white noise that ran through the whole night.

    By the 4-month regression, she was much more aware of sound. A door opening. A car outside. A cough. Someone moving around. All of it could register.

    The Hatch Rest+ Sound Machine was on our nightstand from the newborn days and stayed there.

    I liked that it was phone-controlled, so I did not have to get up to adjust it mid-feed. It also worked as a nightlight at the dimmest possible setting — just enough to see, without making the room feel awake.


    A safe sleep surface

    A safe sleep surface is the baseline everything else builds on.

    For babies, that means a bassinet, crib, or bedside crib with a firm, flat mattress and a fitted sheet. Nothing loose in the sleep space.

    No pillows.
    No blankets.
    No soft toys.
    No loose muslins.

    We made the sleep choices that worked for our family, but I want to be very clear: safe sleep matters, and every parent should make informed decisions based on current guidance and their own pediatrician’s advice.

    A bedside crib or bassinet can be a helpful middle ground if you want baby close, but still on their own separate sleep surface. We chose the Baby Delight Beside me Dreamer bassinet because it was easy to use, sturdy and affordable and it worked pretty well for us.


    The bedtime routine — the thing that mattered most

    If there is one thing I credit most with getting through the newborn phase and the 4-month sleep regression, it is this:

    Same order.
    Same timing.
    Every single night.

    The products helped, but the rhythm is what held everything together.

    1. Short oil massage

    Five minutes of warm coconut oil, gentle strokes, legs, arms, and back.

    She still reaches for this at two years old.

    It was not fancy. It was not a long spa-like baby routine. It was simply a way to tell her body: the day is ending now.

    2. Warm bath

    Short. Warm. Predictable.

    Not every night was peaceful, and not every bath was long. But the signal stayed the same.

    Day is done.
    We are winding down.

    3. Into pyjamas

    The changing ritual became part of the routine.

    Clean diaper. Soft pyjamas. Lights low.

    Zip pyjamas were always easier than snaps for us, especially during night changes.

    4. Feed while singing

    This was the part that made everything feel softer.

    In the dark or near-dark, white noise on, I fed her while singing the same songs every night.

    No bright lights.
    No scrolling.
    No trying to make the room exciting.

    Just feed, sing, breathe, repeat.

    5. Affirmations

    Every night, I said the same little phrases to her:

    You are loved.
    You are safe.
    Mama is always here.
    You are enough.

    At four months, she stared at my face while I said them.

    At one year, she started making sounds along with mine.

    At two years old, she says them with me, word for word.

    The routine did not make the regression disappear. But it gave her nervous system a consistent signal that sleep was safe and coming.

    In a developmental phase when everything else was changing, her night world stayed the same.


    Through the 4-month regression

    The 4-month regression is not something you fix in one night.

    It is a real developmental change in how your baby’s brain processes sleep. It passes — not because you perfectly solve it, but because her brain finishes what it started.

    What helped us was not dramatic.

    It was boring, consistent, and repeated every night.

    No lights at wake-ups

    No overhead lights.
    No lamps.
    No phone flashlight.

    A bright light tells the brain it is time to wake properly. We used the Hatch at its absolute lowest setting if we needed to see anything.

    The goal was simple: keep night feeling like night.

    Same response every time

    We fed, settled, and put her back down in the same way every time.

    Not because every wake-up looked exactly the same, but because predictability was the whole point.

    She was going through a developmental leap. Her daytime world was exploding with new information. Her night world needed to feel familiar.

    White noise all night

    The white noise helped mask the tiny sounds that suddenly started waking her.

    It also became part of the sleep cue. The sound meant: we are still in the night routine.

    For the full account of what the regression was like and exactly how we handled it, read the 4-month sleep regression post.


    The Hatch Go — for naps and travel

    The Hatch Go Portable Sound Machine was the version we used outside the room.

    It clipped to the stroller, the car seat, or the diaper bag.

    White noise cues become sleep cues over time. When the sound traveled with her, so did the signal that sleep was possible.

    Stroller naps, car naps, and trips away from home all became more manageable once we stopped hoping she would settle anywhere and started bringing one familiar sleep cue with us.


    Muslin swaddle blankets — early weeks only

    In the first weeks, muslin swaddle blankets were genuinely useful.

    A snug swaddle can help some newborns feel contained and reduce the startle reflex that wakes them from light sleep.

    We used Comfy Cubs Muslin Swaddle Blankets because they were large enough to swaddle properly and soft enough to keep using long after the swaddling phase passed.

    Once swaddling was done, they became everything else:

    Burp cloths.
    Light covers.
    Nursing covers.
    Stroller shade.
    Emergency clean-up cloths.

    The important safety note: stop swaddling as soon as your baby shows any signs of trying to roll. At that point, switch to a safer sleep option like a wearable sleep sack if you need an extra layer.


    What we did not use

    We did not use a sleep trainer.

    We did not use a graduated extinction method.

    We did not use a wake-windows app.

    We watched her.
    We responded to what she needed.
    We kept the environment consistent.
    We trusted the process.

    At two years old, she falls asleep after her routine, in her own space, without me in the room.

    The path there was not the one the internet usually recommends.

    It was the one that felt right for our family.

    Your instincts about your baby are not wrong. The environment and the consistency can do more than another method, another app, or another person telling you that you are creating bad habits.


    The honest summary

    If I were setting up baby sleep again, I would keep it simple.

    Dark room.
    Steady white noise.
    Safe sleep space.
    Same routine every night.
    No bright lights during wake-ups.
    Portable white noise for travel.
    Muslins in the early weeks, then reused for everything else.

    The goal was never perfect sleep.

    The goal was a baby who felt safe, parents who could survive the night, and a routine we could actually repeat.

    That was enough.

    📌 Save this and share it with any parent heading into the newborn sleep phase.


    Also on Mama Rooted

  • I Tested a Wearable Breast Pump for a Month. Here’s My Honest Take — Including the Parts Nobody Mentions.

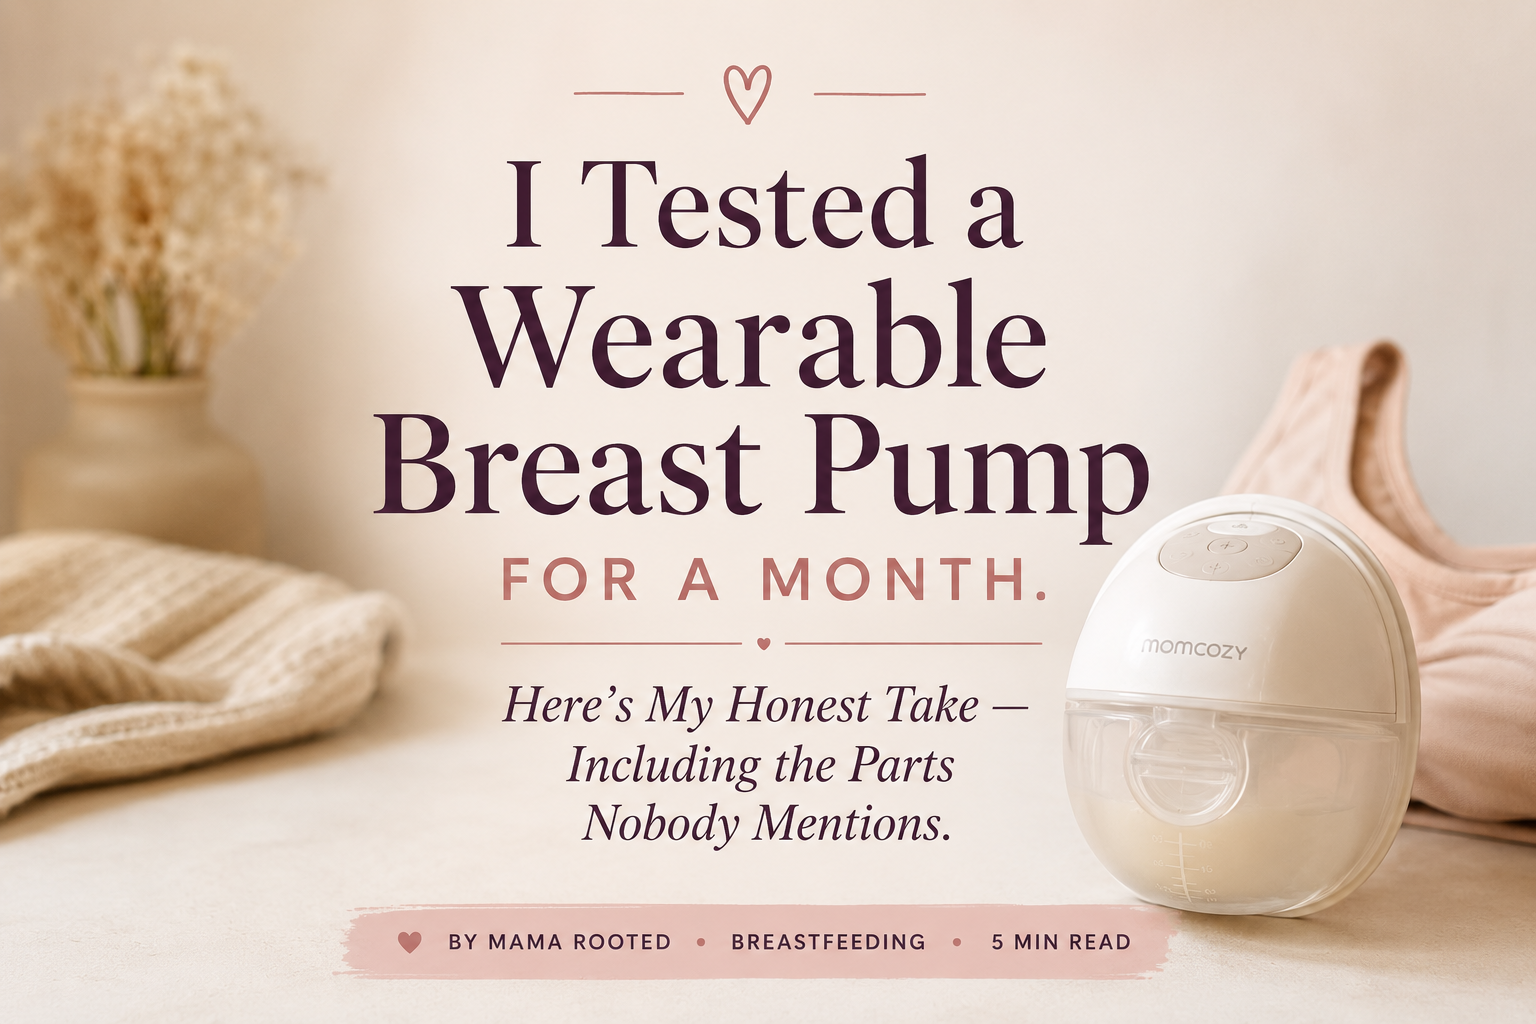
    I Tested a Wearable Breast Pump for a Month. Here’s My Honest Take — Including the Parts Nobody Mentions.

    Before I got the Momcozy wearable pump, my pumping life looked like this:

    Find a plug point.
    Sit down.
    Stay there for twenty minutes.
    Do not move too much.
    Try not to feel like you are tethered to a wall.

    With a baby, a to-do list, and approximately zero moments where sitting still for twenty minutes felt possible, that setup was getting old fast.

    So I tried the wearable.

    And I have thoughts.

    The short version: it did not replace every pump. It did not magically make pumping effortless. But for travel, errands, working from home, and any day where I needed my hands back, it changed everything.

    ⚠️ Affiliate Disclosure: This post contains affiliate links. As an Amazon Associate, I earn from qualifying purchases at no extra cost to you. I only recommend things I personally used or carefully researched.


    Quick verdict — is the Momcozy M5 worth it?

    For me, yes — but only for the right use.

    I would buy the Momcozy M5 wearable pump again if I needed:

    • A pump for travel days
    • Something portable for errands or car rides
    • A secondary pump to use around the house
    • A way to pump without being stuck beside a plug point
    • More flexibility while still breastfeeding or pumping

    I would not choose it as my only pump if I were exclusively pumping or trying to build/protect supply with every session.

    That distinction matters.

    This is not the pump I would buy to replace a strong double electric pump for heavy-duty pumping.

    This is the pump I would buy for freedom.


    What a wearable pump actually is — and what it is not

    A wearable breast pump sits inside your bra.

    No external motor.
    No tubes hanging off you.
    No plug.
    No sitting still beside a wall for twenty minutes.

    It is battery-powered, self-contained, and — if you size the flange correctly — genuinely comfortable enough to wear while moving around.

    But it is important to be clear about what it is not.

    A wearable pump is not always the best replacement for a hospital-grade or strong double electric pump, especially if you are exclusively pumping or pumping to build or protect supply.

    For that kind of pumping, a plugged-in double electric like the Spectra S2 will usually be the more dependable primary pump.

    The Momcozy wearable is brilliant at what it is designed for:

    Mobility.
    Convenience.
    Travel.
    Around-the-house multitasking.
    Pumping when life with a baby does not pause for pumping.

    That is where it shines.


    Where it genuinely changed things for me — travelling

    The moment I understood what the wearable pump was actually for was on a trip.

    No searching for a family room.

    No hunting for a quiet corner with an outlet.

    No unpacking the pump, the tubing, the bottles, the adapter, and everything else that makes pumping feel like setting up a small machine.

    I put it on in the bathroom, got dressed over it, and got on with the day.

    I pumped in the car.

    I pumped while moving through a terminal.

    I pumped while having a conversation.

    That freedom is not a small thing when you are travelling with a baby and the whole day already feels like logistics.

    The Momcozy M5 — which is the one I used — lasted me through travel days on a full charge, which made a big difference. I did not feel like I had to constantly think about where the next outlet was.

    It also comes with multiple flange sizes — 17mm, 19mm, 21mm, and 24mm — so you have a better chance of finding the right fit from the beginning.

    And that matters more than anything.

    With pumps, fit is not a tiny detail.

    Fit is comfort.
    Fit is output.
    Fit is whether you dread using the thing or actually reach for it.

    At home, the wearable meant I could cook dinner, sort laundry, sit at my desk, move through the house, and pump at the same time.

    If you have ever sat attached to a wall pump watching the clock, you know how different that feels.


    The honest tradeoffs — because there are some

    I liked the Momcozy M5, but I do not want this to sound like a perfect product.

    It is not.

    There are a few things I wish every wearable pump review said more clearly.

    1. It is not silent

    The motor is audible.

    Not loud. Not embarrassing. Not impossible to use around people.

    But present.

    You will notice it, and in a quiet room, someone near you may notice it too.

    For errands, car rides, travel, and around the house, this did not bother me. For a silent work call, I would be more careful.

    2. You cannot bend freely

    Wearable pumps are not made for leaning forward.

    If you bend too much, you risk leaking or spilling.

    I learned this quickly.

    Upright positions only while it is running.

    That means you can move around, but you still have to move like someone who knows there is milk sitting inside her bra.

    3. Flange fit is everything

    If the pump hurts, feels uncomfortable, or gives low output, do not immediately assume the pump is bad.

    Check the flange size first.

    This is true for all pumps, but I found it especially true with wearables.

    Because the pump sits inside your bra, the fit has to be right. The insert size, the position, and how securely it sits all affect the session.

    Momcozy including several sizes in the box makes this easier to test.

    4. I would not use it as my only pump if I were exclusively pumping

    This is the biggest one.

    If I were exclusively pumping, or pumping to build and protect supply, I would keep a double electric pump as my primary.

    The wearable would be my secondary pump.

    A brilliant secondary pump.

    But still secondary.

    That is not a criticism. It is just knowing what the product is best at.


    Who this pump is actually for

    The Momcozy wearable is worth considering if any of these sound like you:

    • You travel with your baby
    • You need to pump during day trips, flights, or car rides
    • You work from home and want to pump without stopping everything
    • You are returning to work and need something portable
    • You already have a primary pump and want a more flexible second option
    • You are tired of being anchored to a socket
    • You want something you can use while doing normal life around the house

    This is where the wearable makes sense.

    It is not trying to be the most powerful pump in the world.

    It is trying to make pumping fit into your actual life.

    And for me, that is exactly what it did.


    The product I would pair it with

    If you are using a wearable pump outside the house, especially on travel days, I would also think about milk storage.

    The Momcozy Portable Milk Chiller pairs really well with the wearable because it solves the next problem:

    Okay, I pumped. Now where does the milk go?

    If you are out for a long stretch — airport, hotel, day trip, road trip — having a way to keep milk cold means you are not dependent on finding a fridge immediately.

    Pump.
    Chill.
    Continue your day.

    That combination removed a lot of mental load for me while travelling.


    Bottom line

    The Momcozy M5 wearable breast pump did exactly what I needed it to do.

    It gave me back the ability to move while I pumped.

    For travel days especially, it became the pump I reached for without thinking.

    It is not silent.

    It is not spill-proof if you bend.

    It is not the pump I would choose as my only pump if I were exclusively pumping.

    But for what it is designed for — freedom, convenience, travel, and life with a baby that does not pause for pumping — it genuinely delivered.

    If you are buying one, my biggest advice is this:

    Measure properly.
    Try the flange inserts.
    Use it for the job it is best at.
    Do not expect a wearable to behave exactly like a wall pump.

    Once I understood that, I loved it for what it was.

    A freedom pump.

    Not my only pump.

    But the one that made pumping feel possible on the days I could not sit still.

    If you have questions about sizing, fit, or whether this would work for your specific situation, reach out. I am at mama-rooted.com/contact and I am happy to help you figure out what makes sense for you.

    📌 Save this for any pumping mama who is tired of being tied to the wall.

    Lots of love,
    Mama Rooted


    Also on Mama Rooted

  • My Baby Would Only Sleep on Me. Here’s What We Did — and What Finally Let Me Put Her Down.

    My Baby Would Only Sleep on Me. Here’s What We Did — and What Finally Let Me Put Her Down.

    There was an afternoon when I did not move for three hours.

    Not because I could not.

    Because she was asleep on my chest, and I had learned — the hard way, more than once — that the moment I shifted my weight, adjusted my arm, or breathed too deliberately, her eyes would open.

    And then we would be back at the beginning. The whole settling process, all over again, from scratch.

    So I stayed still.

    For three hours.

    In the same position.

    While my arm went numb, my back ached, and I desperately needed to use the bathroom.

    If you are reading this at 2am with a baby on your chest who will not, under any circumstances, be put down — I see you.

    And I want to tell you something important before I tell you anything else.

    She is not broken. You are not doing it wrong.

    Her nervous system is doing exactly what it was designed to do.


    Why contact naps happen — and why they make complete sense

    Here is the thing I came back to again and again in those early weeks, especially on the days when I was exhausted, touched out, and convinced something was wrong.

    She had just come from the warmest, most regulated environment that exists.

    My heartbeat.

    My warmth.

    My smell.

    My breathing.

    These were the only constants she had ever known.

    And then suddenly she was in a world that was loud, bright, cold, and completely unfamiliar.

    When her nervous system got overwhelmed — when the world became too much — she looked for the one thing she knew for certain.

    Me.

    My smell. My warmth. The rise and fall of my chest.

    Those things told her body she was safe. They regulated her breathing. They slowed her heart rate.

    They were not a bad habit. They were not manipulation. They were not a sleep prop in the scary way the internet sometimes talks about it.

    They were biology.

    Understanding this did not make the numb arm feel better in the moment. But it changed how I responded to it.

    Instead of trying to fight what she needed, I started figuring out how to give it to her in a way that was also sustainable for me.

    A quick safety note before I go further: contact naps were always supervised. If I felt myself getting drowsy, I moved her to a safe sleep surface.

    ⚠️ Affiliate Disclosure: This post contains affiliate links. As an Amazon Associate, I earn from qualifying purchases at no extra cost to you. I only recommend things I personally used or carefully researched.


    What we tried first — and what did not work

    If there is a transfer technique on the internet, we tried it.

    The slow-motion lay-down.

    The wait-until-she-is-deeply-asleep method.

    The warm towel on the mattress.

    The hand-on-chest-to-maintain-pressure technique.

    Some of these worked sometimes.

    Most of them did not work most of the time.

    And the inconsistency was its own kind of exhausting, because every attempt felt like a gamble.

    And losing the gamble meant starting everything over.

    The days when she was overtired were the worst.

    On those days, contact was the only thing that worked.

    Not the cot.

    Not a swing.

    Not a swaddle on its own.

    Me.

    Specifically me.

    And once I stopped fighting that and started working with it, things got easier.


    The things that actually helped us

    The Boba Wrap — hands-free contact that kept us both sane

    The Boba Wrap was the thing that made contact naps survivable in those early weeks.

    The idea is simple:

    She got the contact, warmth, and closeness her nervous system needed.

    I got my hands back.

    That sounds small until you have spent days nap-trapped under a newborn and unable to eat, drink water, answer a message, fold laundry, or use the bathroom without restarting the entire nap.

    With the wrap, I could move through the house like a functioning person while she slept against my chest and felt completely held.

    This mattered more than I expected.

    When you are stuck in one position for hours, unable to do anything, the frustration builds in a way that affects the whole day.

    The wrap did not change what she needed.

    But it changed how I could meet it.

    She felt my heartbeat.

    I felt her settle.

    And I could actually take care of myself at the same time.

    For newborn contact naps, this is the thing I would tell every new mama to have ready before the baby arrives.


    White noise — building a sleep cue she could take anywhere

    White noise was the other thing that shifted everything, and it worked in a way I did not expect.

    It was not just about blocking out sound — though it did that too.

    That matters when a door closing, a car outside, or someone moving around the house can undo a twenty-minute settling process.

    But over time, white noise became a signal.

    A cue her brain started to associate with sleep.

    Once that association built, the sound itself began doing some of the work that my presence had been doing alone.

    We used the Hatch Rest+ Sound Machine in the room — phone-controlled, so I never had to get up to adjust it mid-feed.

    And the Hatch Go clipped wherever we needed sleep to happen — the pram, the diaper bag, travel days, and later naps away from home.

    This was one of the most practical shifts we made.

    When the white noise went on, her body started to understand what came next.

    And that predictability made every transition easier, including the big one.


    The gradual transition — not a method, a process

    We did not use a formal method to move her from contact naps to sleeping in her own space.

    What we did was gradual.

    And more importantly, it respected what she actually needed instead of trying to override it.

    The beginning of the transition was simple.

    Instead of trying to move her from my arms to a flat surface across the room, I started by lying down with her and then very slowly — over the course of minutes — shifting her beside me rather than underneath me.

    Small.

    Slow.

    No sudden changes.

    From there, we moved to the Baby Delight Beside Me Dreamer Bassinet, which sat right beside my bed.

    This was the piece that gave me what I was really looking for:

    A way to keep her close, responsive, and reassured — without needing to be physically underneath her for every sleep.

    I could reach her within seconds.

    She was close enough to sense me.

    But she was on her own separate sleep surface.

    The difference was significant.

    Not overnight.

    Gradually.

    But it worked because we were not fighting what she needed.

    We were finding a version of closeness she could accept without me being the mattress.


    What I want you to know if you are in this right now

    Contact napping is not a failure.

    It is not proof that you have ruined sleep.

    It is not something your baby is doing to manipulate you.

    It is your baby telling you, in the only language she has, that the world is a lot and you are the thing that makes it manageable.

    The transition comes. For every family, it looks different and happens at a different pace. What made it possible for us was not a strict method or a scheduled program.

    It was understanding what she actually needed, finding ways to meet it that were also sustainable for me, and making changes so gradually that her nervous system barely registered them.

    The wrap.

    The white noise.

    The bedside bassinet instead of a sleep space across the room.

    Three small things that gave her what she needed and gave me what I needed too.

    If you are in the still-for-three-hours stage right now — hang in there.

    This is the hard part.

    It does not last forever.

    And if you have questions about any of it, or you want to talk through what might work for your specific situation, reach out.

    I mean it.

    I am at mama-rooted.com/contact and I am happy to help.

    📌 Save this for any mama whose arms have not been free in days.

    You are not alone.

    Lots of love,
    Mama Rooted


    Also on Mama Rooted

  • Everyone Told Me My Baby Was Hungry. I Chose Not to Believe Them Without Proof.

    Everyone Told Me My Baby Was Hungry. I Chose Not to Believe Them Without Proof.

    There was a week around the eight-week mark where I was convinced I was losing my milk.

    She was feeding constantly. Pulling off. Crying. Going back on. The feeds that used to feel predictable suddenly had no end. I was googling “low milk supply signs” at 2am with one hand while she nursed with the other.

    And I was sure.

    Absolutely sure.

    That my body was failing her.

    It was not.

    But here is the part nobody talks about enough: I did not just have my own doubts to manage.

    I had everyone else’s too.

    ⚠️ Affiliate Disclosure: This post contains affiliate links. As an Amazon Associate, I earn from qualifying purchases at no extra cost to you. I only recommend things I personally used or carefully researched.


    If you are panicking about your supply tonight

    Here is the short version before we get into the whole story:

    • A fussy, cluster-feeding baby does not automatically mean low milk supply.
    • Soft breasts do not automatically mean empty breasts.
    • Pump output does not always show how much milk your baby is getting.
    • Wet diapers, weight gain, and professional assessment matter more than worried comments.
    • If something feels wrong, call your pediatrician, midwife, or lactation consultant.
    • If you are in pain, or your baby is not gaining well, do not wait it out alone.

    What helped me most was not guessing.

    It was getting someone qualified to look at my actual baby, my actual latch, and my actual feeding situation.

    After that, the practical things helped too: feeding on demand, eating properly again, keeping water beside me, and using the Haakaa so I could see that milk was still there.

    But the first step was evidence.

    Not panic.


    The comments that nearly broke me

    When a baby wakes more often, seems fussier than usual, or cluster feeds until ten at night — people notice.

    And people have opinions.

    “Maybe she’s not getting enough.”

    “Her tummy probably isn’t filling up properly.”

    “Have you thought about topping her up?”

    These comments came from people who loved us. People who were worried. People who genuinely thought they were helping.

    I understand that now.

    But in the moment — sitting in that nursing chair, exhausted, emotional, and already convinced something was wrong — those words were destabilising.

    Because when someone you love says, “Maybe you are just not making enough,” your brain files that away as evidence.

    It stacks on top of the googling.

    It stacks on top of the soft breasts.

    It stacks on top of the long feeds.

    And before long, you are not just worried. You are certain.

    The well-meaning comments of the people around you can shake your breastfeeding confidence more than almost anything else.

    Not because they are cruel. Because they land when you are at your most vulnerable.


    What I chose to do instead

    I chose not to accept the verdict without evidence.

    That sounds simple.

    It was not. It took a real, deliberate decision to say:

    I am not going to act on this fear — or on what other people are telling me — until someone qualified has actually looked at this situation and told me there is a problem.

    So I called a lactation consultant.

    She did a weighted feed. She weighed my daughter before and after nursing. She watched the latch. She watched me. She looked at the whole picture.

    And then she told me, in a completely matter-of-fact way, that nothing was wrong. My daughter was transferring milk efficiently. What I was experiencing sounded like supply regulation.

    The cluster feeding was demand, not distress.

    The soft breasts meant my supply had started to calibrate, not disappear.

    That appointment changed everything.

    Not because she said something I could never have read online.

    But because it was a qualified professional who had actually looked at my baby, my latch, and my specific situation — and given me real information instead of a guess.

    If you are in this moment right now, please hear this:

    A worried comment is not evidence.

    Get the professional opinion first.

    Then decide.

    You can find an IBCLC through ILCA, or ask your pediatrician, midwife, OB, or hospital for a lactation referral.


    What was actually happening at week eight

    She was cluster feeding.

    For two or three evenings in a row, she would be on and off the breast from about five in the evening until nine or ten at night.

    I was sitting in the same spot, same nursing pillow, same water bottle, barely moving.

    My breasts felt softer between feeds than they had in the early weeks.

    What I thought was happening:

    My milk was going.

    What was actually happening:

    My supply was settling into a new rhythm.

    The early post-birth hormone surge had eased. My body was starting to shift from that full, engorged early feeling into a more regulated supply. The cluster feeding was my daughter signalling my body to make what she needed.

    A soft breast at eight weeks is not automatically an empty breast.

    Sometimes it is a breast that is learning what it is doing.

    But I did not know to expect this.

    So I spent a week convinced I was failing.


    What low milk supply actually is, and what it is not

    Low milk supply is real.

    Some mothers genuinely do need support with supply. Some babies do need supplementation. Some situations need quick medical attention. I do not want to minimize that.

    But what feels like low supply is not always low supply.

    Sometimes it is a growth spurt.

    Babies often cluster feed intensely during growth spurts. She may not be telling you the milk is gone. She may be asking your body to make more.

    Sometimes it is supply regulation.

    In the first weeks, many mothers feel fuller, leakier, and more obviously “full.” Then engorgement eases. Breasts soften. Leaking may slow down.

    That can feel terrifying if nobody warned you.

    But softer breasts alone do not mean your milk is disappearing.

    Sometimes it is latch, letdown, distraction, or tiredness.

    Pulling off, fussing, and seeming frustrated at the breast can happen for reasons that are not supply. Letdown may be faster or slower. Baby may be overtired. Baby may need help with latch or positioning.

    This is exactly why having someone qualified observe a feed can be so helpful.

    Call your pediatrician, midwife, or lactation consultant if you notice things like:

    • Fewer than 6 wet diapers in a day
    • Ongoing weight loss or poor weight gain
    • Baby not regaining birth weight in the expected window
    • Signs of dehydration
    • Baby consistently seeming weak, sleepy, or unable to feed effectively
    • Severe nipple pain, cracked nipples, bleeding, or feeds that make you dread latching
    • Your instinct telling you something is not right

    If you are seeing those signs, please do not wait and hope.

    Get help.

    But if your baby is gaining, having enough wet diapers, and the main issue is that she is suddenly feeding constantly while everyone around you is panicking, it may not be a supply crisis.

    It may be a hard, normal breastfeeding phase that needs support, not fear.


    What I did, and what helped

    I took my nutrition seriously again

    I was lucky enough to have the first forty days after birth held by my family in the way Indian culture has practiced for generations.

    Warm, nourishing food made for a recovering postpartum body and a breastfeeding mother.

    Ajwain water.

    Soaked almonds.

    Ghee.

    Warm meals, always warm.

    I do not think this was coincidence.

    The food I ate in those first forty days made a real difference to how I felt and, I believe, to how my body recovered and established breastfeeding.

    I have written about it in detail in my post on what my family fed me for the first 40 days after birth. The short version is this:

    Nutrition is not a cute extra during breastfeeding.

    It is the foundation.

    During the week of doubt, I realized I had let the eating slip.

    Too busy.

    Too tired.

    Too preoccupied with the feeds to actually feed myself properly.

    Going back to eating regularly — warmly, properly, and enough — was one of the most concrete things I did to support myself.

    Not as a magic supply fix.

    As basic care for a body doing enormous work.


    I kept water beside me before every feed

    Breastfeeding thirst is its own category of relentless.

    I had also been forgetting to fill my water bottle during that week.

    And while water alone does not magically solve supply, being underfed, overtired, and under-hydrated does not help any mother feel steady.

    I went back to keeping my HydroJug Traveller filled before feeds.

    Not because it was going to instantly “boost milk.”

    Because I was breastfeeding for hours and needed water where I could reach it.

    That mattered.


    I fed on demand, not on a schedule

    Every time she signalled hunger, I fed.

    Not because it was easy.

    It was not.

    But because frequent milk removal is one of the clearest ways the body gets the message to keep making milk.

    In a moment of worry about supply, feeding more often — while getting proper support if something feels wrong — made more sense than trying to stretch feeds or force a schedule.

    The evenings were long.

    The cluster feeds were intense.

    But I kept reminding myself:

    This is information my body is receiving.

    This is not proof that my body is failing.


    I added the Haakaa

    The Haakaa silicone pump attaches to the opposite breast while you nurse and catches letdown passively.

    No motor.

    No cords.

    No complicated parts.

    No extra pumping session to mentally prepare for.

    I started using it during feeds and was genuinely surprised by how much I was collecting without trying.

    This helped me in two ways.

    Practically, it helped build a small stash without turning pumping into another full-time job.

    Emotionally, it gave me visible reassurance.

    Seeing actual milk in a container when my brain was telling me there was none was grounding in a way I had not expected.

    It was not the only reason I kept breastfeeding.

    But in that week, it helped quiet the panic.


    I stopped watching the clock and started watching her

    The lactation consultant said something that I come back to often:

    The evidence you need is a fed, growing baby.

    Not how full your breasts feel.

    Not how long the feed lasts.

    Not what one pumping session yields.

    Not what someone else thinks from across the room.

    A baby who is gaining, feeding effectively, and having enough wet diapers is giving you real information.

    Everything else needs context.


    What I did not do

    I did not accept “your baby is hungry” as a conclusion just because someone said it with confidence.

    The people around me were not being unkind.

    They were worried.

    They were filling in the gaps with the logic that seemed obvious:

    Waking more often must mean hungry.

    Hungry must mean not enough milk.

    Not enough milk must mean top up.

    That logic feels airtight from the outside.

    But it is not always true.

    I chose not to act on it — not to change everything, not to supplement out of panic, not to give up — until someone who was actually qualified to assess the situation had done so.

    That decision protected my breastfeeding journey.

    I also did not stop feeding.

    Even on the hardest evenings of that week, even when it felt endless and pointless, I kept going while I got help.

    Because stopping abruptly out of fear could have created the supply drop I was afraid of having.


    The two things I would buy again for that week

    If you are in that supply-panic window and trying to make the next feed feel less overwhelming, these are the two things I would buy again first.

    1. The Haakaa silicone pump

    For passive milk collection and visible reassurance.

    It did not replace professional support. It did not diagnose anything. But it helped me see that my body was still making milk, and it helped build a small stash without adding another full pumping session.

    2. A large water bottle that actually stays beside you

    For the hours you spend trapped under a feeding baby.

    I used the HydroJug Traveller because it held enough water, had a straw, and lived beside my nursing chair.

    It was not glamorous.

    It was useful.

    And if latch pain is part of your story, do not just buy products and hope it goes away.

    Get the latch checked.

    Nipple cream, silver cups and Boppy nursing pillow can help comfort and healing, but they cannot fix a latch issue by themselves.

    The latch is the root.

    The products are support.


    What I would tell you right now

    If you are in this moment — if someone has said, “Maybe she is just not getting enough,” and it has lodged in your chest and you cannot get it out — I want you to hear this:

    A comment is not a diagnosis.

    Your fear is not proof.

    Your soft breasts are not proof.

    Your baby wanting to feed again is not proof.

    Get the professional opinion.

    Take your nutrition seriously.

    Drink the water.

    Keep feeding if your baby is able to feed and you have not been told otherwise.

    Ask for help before the fear makes the decision for you.

    The doubt you are feeling is not evidence that you are failing.

    It is evidence of how much you love her.

    You deserve real support, not guesses.

    You deserve to make the next decision from information, not panic.

    Lots of love,
    Mama Rooted

    📌 Save this for any mama whose confidence in her supply is being chipped away by the people around her. She needs to read this.


    Also on Mama Rooted

  • Travelling With a Baby 0–6 Months: What Actually Made It Work for Us

    Travelling With a Baby 0–6 Months: What Actually Made It Work for Us

    ⚠️ Affiliate Disclosure: This post contains affiliate links. I may earn a small commission at no extra cost to you.

    We started travelling with our daughter before she was three months old.

    Multiple city trips in her first six months. More than one flight. More than one “why did we think this was a good idea?” moment. And yes — I travelled solo with her more than once.

    Travelling with a baby is not easy, exactly. But it is not impossible either. What made the biggest difference for us was the right gear, a loose plan, and a willingness to adjust mid-flight when things did not go perfectly.

    Here is what actually made it work.

    For moms packing in a hurry

    Here is the short version of what actually made baby travel easier for us:

    If you only do one thing before travelling with a baby, make the essentials easy to reach. The gear matters, but the setup matters more.

    You can also check out the Amazon list with exact links of all the products here.


    The bag: backpack, always

    We tried a shoulder bag.

    It lasted one trip.

    With a baby, you are already carrying more than you think. Your body is tired. You might be wearing her. You might be holding a boarding pass, a bottle, a pacifier, a stroller, or your own coffee that has gone cold. The last thing you need is a bag that slides off one shoulder every time you bend down.

    A backpack distributes the weight properly. Both parents can wear it without adjusting everything. And when I was travelling solo, having my hands completely free was not optional.

    We chose the Astro Alan Diaper Bag Backpack for exactly this reason: structured, roomy, practical, with lots of pockets, stroller straps, and a built-in changing station.

    Was it the most delicate, aesthetic little bag? No.

    Did it make travel easier? Absolutely.

    Practical over stylish, every time.


    Stroller and car seat: choose the setup that removes the most friction

    For city travel, airport days, taxis, and moving through unfamiliar places, the stroller and car seat setup matters more than I expected.

    There are two routes I would seriously consider.

    Option 1: The Doona travel system

    If you want the simplest possible travel setup, the Doona Car Seat & Stroller is the one I would look at first.

    It is not a regular cabin stroller. It is an infant car seat that converts into a stroller, which means you are not carrying a separate car seat in one hand and pushing a separate stroller with the other. For airport travel, taxis, quick city trips, and solo travel, that simplicity is the whole point.

    The biggest benefit is that you can move from car to stroller mode quickly without unpacking your whole setup or waking the baby more than necessary.

    I would especially consider the Doona if:

    • You travel often in taxis or rideshares
    • You fly with a baby under 1 year
    • You live in a city or walk a lot
    • You want fewer pieces of gear to manage
    • You are travelling solo and need your hands free

    The tradeoff is that it is still an infant car seat, so it will not last forever. It also does not have the same storage or long-term stroller use as a separate travel stroller.

    But for the 0–6 month travel stage? It was a lifesaver.

    Option 2: Lightweight stroller + infant car seat combo

    The other route is a lightweight travel stroller with a compatible infant car seat.

    This gives you more flexibility. A separate lightweight stroller may fold smaller, have more storage, and last longer than the infant car seat stage. Your car seat can click in when needed, and the stroller can still be used later once baby outgrows the infant seat.

    Our car seat was the Graco SnugRide Infant Car Seat — reliable, familiar, and easy to use as part of a travel setup. The combination of a compact stroller and infant car seat made arrival days feel less chaotic because we immediately had a functional setup.

    I would choose this route if:

    • You want a stroller you can use beyond the infant car seat stage
    • You need more basket storage
    • You want something lighter to push around all day
    • You are not using taxis/rideshares constantly
    • You prefer separating the car seat from the stroller

    You could either choose the Graco travel system for easiest compatibility but it’s not the most compact travel option.

    The other option is to get the lightweight Baby Jogger City Tour 2 with the Baby Jogger adapter for car seat compatibility. That is extremely lightweight and you can actually keep it in flight cabin as well. We chose the Baby Jogger. It was comfortable for our baby and it worked for us well after our baby outgrew the car seat. Please check your Graco car seat model for compatibility.

    To summarize,

    If you want the fewest pieces: Doona
    If you already have a Graco car seat: Baby Jogger City Tour 2 + correct adapter
    If you want easiest compatibility: Graco travel system

    If you are flying, check your airline’s car seat and stroller policy before you go. Many airlines allow parents to check a stroller and car seat for free, but the exact rules around gate-checking, cabin storage, and onboard car seat use vary by airline. The FAA says the safest place for a child under two on a U.S. airplane is in an approved child restraint system, not on a lap.


    Feeding on the go: the Momcozy chiller and warmer

    This was the product that removed the most stress from longer outings and flights.

    The Momcozy Portable Breast Milk Chiller meant I could store breast milk for a much longer time and Momcozy Portable Bottle Warmer meant I was not dependent on finding a microwave, a café, hot water, or someone willing to help me warm a bottle in an unfamiliar place.

    For a breastfeeding mom who was also pumping — or for anyone giving bottles on the go — that mattered.

    It made feeding feel less like a logistical emergency.

    For airport travel, breast milk, formula, toddler drinks, baby food, and cooling accessories are allowed through TSA in quantities greater than 3.4 oz / 100 ml. Separate them from the rest of your liquids and tell the TSA officer before screening.

    Rules and screening experiences can vary by airport and country, so I would still check your departure airport, airline, and destination guidance before you travel.


    Flying: the strategy that made the biggest difference

    You cannot always time a flight perfectly around a baby’s nap schedule.

    But you can try.

    We looked at her usual nap windows and booked flights that overlapped with them where possible. Not because it always worked — it did not — but because the attempt alone reduced the chances of landing with an overtired, overstimulated baby who had been awake for six hours.

    The two things that consistently helped on planes were simple.

    Feed during takeoff and landing

    Pressure changes can be uncomfortable for tiny ears. Sucking and swallowing can help — whether that is breastfeeding, bottle feeding, or using a pacifier.

    We kept a feed or pacifier ready for both takeoff and landing without exception.

    Bring one or two tiny distractions

    For the early months, high-contrast books worked better than most toys. Black, white, and bold patterns held her attention in a way soft pastel illustrations did not.

    By the 4–6 month range, one small supervised fidget-style toy or spinner could buy us a few quiet minutes. Not an entire peaceful flight. Just a few minutes. Sometimes that is enough.

    The pacifier was our non-negotiable flight backup, even on days she did not seem that interested in it at home.


    What to actually pack: the travel version

    For the full everyday diaper bag contents, see our diaper bag post. Travel is different.

    For travel days, I would adjust the bag like this:

    The key is not to pack the whole nursery.

    The key is to make the things you actually need reachable.

    A diaper cream buried under three outfits, two blankets, and your own headphones is not helpful at 30,000 feet.


    What I would not pack again

    I would not pack three full outfits unless it was a very long travel day.

    I would not pack a pile of toys for a baby under six months.

    I would not bring a huge blanket when a muslin cloth did three jobs.

    I would not overfill the diaper bag so badly that I had to unpack half of it just to find wipes.

    And I would not assume that more stuff meant more prepared.

    More stuff often just meant more digging.


    The honest truth about travelling with a baby

    Some trips were smoother than expected.

    Some were genuinely hard.

    What helped was deciding in advance that things might not go perfectly — and being okay with that.

    A baby who cries on a plane is not a failure of planning.

    It is a baby on a plane.

    The gear reduces the friction. The mindset carries you through the rest.

    Travelling with her in those first six months gave me some of my favourite memories from that season. Not because every moment was calm. It was not. But because we learned that we could still go places, still adjust, still be a family outside the house.

    Do not wait until it feels easy.

    It gets easier as you go.

    📌 Save this for anyone planning their first trip with a baby. You’ve got this Mama. Lots of love, Mama Rooted.


    Also on Mama Rooted

  • Newborn Essentials List: What You Actually Need, What Can Wait, and What to Skip

    Newborn Essentials List: What You Actually Need, What Can Wait, and What to Skip

    ⚠️ Affiliate Disclosure: This post contains affiliate links. I may earn a small commission at no extra cost to you.

    Every newborn essentials list online has about 80 items on it and zero indication of which ones actually matter.

    So here is mine, sorted honestly into three tiers across seven categories: the things that genuinely earned their place in our house, the things that were nice but not urgent, and the things I would skip completely if I were starting over.

    Absolute Must-Have = buy before the baby arrives.
    Nice-to-Have = useful, but can wait.
    Skippable = save your money.

    If you are building a registry, start with the must-haves only. Add the nice-to-haves later, once you know your baby, your feeding rhythm, and what your house actually needs.

    Quick answer: what newborn essentials do you actually need?

    The newborn essentials I would buy before baby arrives are diapers, wipes, zip-up sleepers, muslin burp cloths, diaper cream, a safe sleep space, a sound machine, a waterproof changing pad, a boppy nursing pillow and a few bottles, an installed car seat, and a basic grooming kit.

    Everything else can wait.

    You do not need a perfect nursery, a giant registry, or every baby gadget someone on TikTok swears by. You need the items that reduce repeated decisions when you are tired, healing, feeding, changing, and doing it all again two hours later.

    10 things I would buy from this list first


    😴 Sleep

    Absolute must-haves

    For sleep, I would start with:

    A safe sleep space is the non-negotiable. The Hatch Rest+ was the thing that made our nights feel more predictable. For us, white noise and a dark, calm room helped create a routine when everything else felt new.

    The muslin swaddles did not just get used for sleep. They became burp cloths, nursing covers, stroller covers, tummy time mats, and emergency clean-up cloths. That is the kind of newborn item I like: one thing that quietly does five jobs.

    Nice-to-have

    Blackout curtains became more useful as naps became more structured. The Hatch Go was helpful when we were away from home or needed a portable sound cue, but I would not buy it before the basics. Baby Monitor was useful even when we were co sleeping and during nap times.

    Skip it

    Skip elaborate nursery decor before you know what your routine actually looks like.

    The baby does not care if the shelves are styled. You will care much more about whether the burp cloths are within arm’s reach.

    🛒 Best first buys from this section:


    🍼 Diapering

    Absolute must-haves

    For diapering, I would start with:

    Do not overbuy newborn diapers. Some babies outgrow them fast, and some skip them completely. I would rather have one small pack of newborn diapers and one size 1 pack ready than a closet full of the wrong size.

    Boudreaux’s Butt Paste was one of the products we actually used constantly. We used it preventatively, not just once things got irritated. That made it feel less like an emergency product and more like part of the routine.

    Nice-to-have

    The diaper caddy was less about being cute and more about not yelling, “Where are the wipes?” ten times a day. When diapers, wipes, cream, and a backup onesie all lived in one place, anyone helping could actually help.

    Skip it

    Skip the wipe warmer. The diaper pail.

    We used it twice. It took up the whole counter, and it made one more thing to clean, refill, and think about.

    🛒 Best first buys from this section:


    🛁 Bath and Care

    Absolute must-haves

    For bath and basic care, I would start with:

    The grooming kit mattered more than I expected. Tiny newborn nails are terrifying, and having the nail file, scissors, comb, and thermometer in one place made the whole thing feel less intimidating.

    The NoseFrida is one of those things that sounds unnecessary until your newborn has a stuffy nose at 2am. Nothing we tried cleared a newborn nose faster.

    Nice-to-have

    The bath set is sweet, useful, and giftable. But if you are trying to keep your registry lean, it can wait.

    Skip it

    Skip the cute novelty bath thermometer.

    If you want a thermometer, choose a simple basic one. You do not need the duck-shaped one that takes up half the bath basket.

    🛒 Best first buys from this section:


    👶 Clothing

    Absolute must-haves

    For newborn clothing, I would start with:

    Zip-up sleepsuits are not a preference. They are a 3am survival decision.

    Snaps look sweet until you are trying to line them up in the dark with one eye open. Zips make night changes faster, especially in the early weeks when diapers happen constantly.

    Muslin cloths were another daily-use item. They were burp cloths, light blankets, floor covers, feeding covers, and emergency spit-up rescue. I would buy more muslins and fewer cute outfits.

    Nice-to-have

    • Extra burp cloths
    • A few 0–3 month outfits
    • Soft mittens, only if your baby scratches a lot

    You will go through more burp cloths than seems reasonable. Cute outfits are nice, but the everyday workhorses are zip sleepers and soft cloths.

    Skip it

    Skip newborn shoes, complicated going-home outfits, and a full wardrobe of 0–3 month clothes.

    She will outgrow them faster than you think. And the outfit with six tiny buttons is not the one you will reach for after a diaper blowout.

    🛒 Best first buys from this section:


    🤱 Feeding

    Absolute must-haves

    This section depends on how you plan to feed, so I would think of it in two versions.

    If you are breastfeeding, I would start with:

    The Boppy helped with positioning when I was tired and still learning. Lansinoh nipple cream was not optional for me in the beginning. I kept one by the bed and one near the feeding spot because searching for nipple cream after a feed is not a personality-building experience.

    The Haakaa was one of the best-value products we owned. It was inexpensive and helped collect letdown without needing to set up a full pumping session.

    If you are formula feeding or combo feeding, swap the Haakaa and nipple cream priority for:

    Newborn feeding supplies are not one-size-fits-all. The best setup is the one that supports the way your baby is actually being fed.

    Nice-to-have

    We invested in a portable bottle warmer so that we dont have to buy a separate one when we travel. But I would not panic-buy every feeding accessory before you know your rhythm.

    Skip it

    Skip the bulky countertop sterilizer unless you know you will use it daily.

    Microwave steam bags were enough for us, and they took up almost no space.

    🛒 Best first buys from this section:
    For Breastfeeding moms:

    For formula or combo feeding: Dr. Brown’s bottles:


    🚗 On the Go

    Absolute must-haves

    For leaving the house, I would start with:

    The car seat is the real must-have here. The diaper bag comes next, but it does not need to be packed like you are leaving for a week.

    A properly organized diaper bag made leaving the house feel less dramatic. The goal was not to carry everything. The goal was to carry the exact things that prevented a small problem from becoming a full reset.

    Nice-to-have

    The Boba Wrap was lovely for hands-free newborn carrying, especially in those early weeks when the baby wanted to be close and I still needed both hands.

    Skip it

    Skip packing three spare outfits and a toy “just in case.”

    One spare outfit is enough. If you need more than that, you are probably going home anyway.

    🛒 Best first buys from this section:


    🧸 Play

    Absolute must-haves

    Honestly, nothing yet.

    A newborn does not need toys. She needs your face, your voice, your smell, and safe places to rest and be held.

    This is the category where I would spend the least before baby arrives.

    Nice-to-have

    The activity gym became useful once tummy time became part of the routine. It made a resisted task a little easier and gave her something to look at.

    Skip it

    Skip every toy that lights up, sings, and promises early development.

    She will not notice most of them until later. And by then, you will have a better sense of what she actually likes.

    🛒 Best first buy from this section:


    The honest newborn essentials summary

    Across all seven categories, the things that mattered most were almost never the expensive ones.

    The Haakaa was inexpensive and useful. The grooming kit kept us from putting off nail trims for two weeks. Zip-up sleepsuits saved us at 3am more times than I can count. Burp cloths and muslins were used constantly, in every room.

    Buy the must-haves before baby arrives. Let the nice-to-haves wait until you know your routine. And do not feel bad about the skippables sitting unopened in a closet — every parent has a few.

    Start with what reduces decisions, cleanup, and panic. That is the real newborn essentials list.

    The Must Haves at one place

    📌 Save this for your registry or send it to a friend who just found out she is expecting. Lots of love, Mama Rooted


    Also on Mama Rooted

  • Boba Wrap vs Ergobaby Omni Classic — We Used Both at Different Stages

    Boba Wrap vs Ergobaby Omni Classic — We Used Both at Different Stages

    ⚠️ Affiliate Disclosure: This post contains affiliate links. I may earn a small commission at no extra cost to you.

    The most common babywearing question I hear is:

    Which carrier should I buy?

    My honest answer is that it depends less on finding one perfect carrier and more on understanding what kind of support you need at each stage.

    We started using the Boba Wrap when our daughter was around three weeks old. It carried us through the newborn months and the contact-nap stage.

    When she became heavier and the stretch started working against us, we moved to the Ergobaby Omni Classic. We continued using that structured carrier through toddlerhood.

    They did not compete with each other.

    They solved two completely different problems.

    The Boba gave us soft, close newborn comfort. The Ergobaby gave us structured support once carrying a growing baby became physically harder.

    This is the honest breakdown of both: what each one did well, where each one fell short, and which one I would buy first.

    The quick answer

    Choose the Boba Wrap if: you want a soft, close carrier for the newborn and early months.

    Choose the Ergobaby Omni Classic if: you want more structure, easier weight distribution and a carrier designed to last into toddlerhood.

    Choose both if: you want one soft option for the fourth trimester and one structured option for later.


    Boba Wrap — the newborn and early-month carrier

    We introduced the Boba Baby Wrap Carrier at around three weeks, and it changed the third and fourth months completely.

    The first time I placed her inside, she settled almost immediately.

    That was the moment I understood what babywearing could do.

    She went from fussy and unsettled to calm against my chest in under two minutes. The warmth, closeness and familiar sound of a heartbeat seemed to give her what she had been asking for.

    The Boba Wrap is officially rated from 7 to 35 lb, although Boba says it tends to work best up to approximately 20 lb. For us, the practical transition happened much earlier than the maximum weight because the stretch began to feel less supportive as she became heavier.

    What we loved about the Boba Wrap

    This was not something she slowly learned to tolerate.

    For us, the effect was immediate and consistent. When she was fussy, overtired or refusing to be put down, the Boba was often the fastest way to help her settle.

    When correctly tied and positioned, the wrap spreads from knee pit to knee pit and supports the baby close against the wearer’s chest.

    That close, contained feeling worked particularly well during the contact-nap phase.

    She would sometimes sleep against me for long stretches when nothing else worked.

    The Boba did not eliminate contact naps. It made them survivable.

    I could move around carefully, eat something or sit with both hands available instead of holding her weight the entire time.

    Once I knew the tying sequence, I could put the wrap on before leaving the house.

    That meant I was not standing in a car park trying to work with several metres of fabric while holding a baby.

    Once we arrived, getting her inside took very little time.

    The wrap looks intimidating before you understand it.

    After one proper practice session, my husband could use it without needing me to supervise every step.

    We paid around $35 for ours, although the current price may vary.

    For something that gave us so many contact naps, calmer evenings and hands-free moments, it became one of the highest-use items in our early baby kit.

    The honest catches

    Do not wait until you are holding a crying newborn to attempt the wrap for the first time.

    Practice once before the baby arrives.

    Use a doll, a rolled towel or anything that lets you understand the fabric passes and how tight the wrap needs to feel.

    The wrap should hold the baby snugly against your body without allowing slumping.

    The Boba may technically support a higher weight than you personally find comfortable.

    For us, the transition happened when the fabric began to feel like it had too much give under her growing weight.

    That is when we stopped looking at the maximum rating and started listening to our bodies.

    You are wearing multiple layers of fabric, and the baby is pressed closely against your body.

    In warm weather, that heat builds quickly.

    We used lighter clothing underneath and paid close attention to both her temperature and mine.

    Even after you know how to use it, there is still a tying process.

    Some days that felt completely manageable.

    On other days, I wanted something I could clip on without thinking.


    Ergobaby Omni Classic — structured support as she grew

    Once our daughter became heavier, the softness we loved about the Boba started becoming the thing that made it less comfortable.

    We moved to the Ergobaby Omni Classic. The difference in carrying comfort was immediate.

    The Boba distributes weight through wide fabric passes across the shoulders and back. The Ergobaby adds a structured waistband and padded shoulder straps, which changed how the weight felt on my body.

    The current Omni Classic is rated from 7 to 45 lb and supports front inward, front outward, hip and back carries. It is also machine washable.

    Although it can be used from the newborn stage when the baby meets the model’s requirements, we personally preferred the softness and closeness of the Boba during the early weeks.

    What we loved about the Ergobaby Omni Classic

    Once adjusted to my body, it was essentially:

    Waistband. Shoulder straps. Buckles. Tighten. Go.

    There was no long fabric and no tying sequence.

    That simplicity mattered more as she became heavier and less patient about waiting.

    The cool mesh helped keep our daughter cool and prevented overheating, which was one thig we had to keep checking for with the Boba.

    With Ergobaby that was one less thing for us to worry about and honestly that was a huge relief.

    The structured waistband moved more of the load towards my hips rather than leaving the entire sensation across my shoulders and upper back.

    Carrying became comfortable again.

    That was the main reason the Ergobaby earned its place.

    The Omni Classic supports:

    • front inward-facing
    • front outward-facing
    • hip carry
    • back carry

    We did not need every position immediately.

    But having those options meant the carrier adapted as her body, curiosity and weight changed.

    My husband found it much easier to put on quickly because there was no wrapping technique to remember.

    We still adjusted the straps between wearers, but it was a faster handover than retying a wrap.

    This was not a short-lived newborn purchase.

    We used it into toddlerhood, which made the higher upfront cost easier to justify.

    The current official price is approximately $179, although Amazon pricing and sales may differ.

    This sounds like a minor detail before you have a baby.

    It does not feel minor after months of milk, drool, food and outdoor use.

    The honest catches

    The Ergobaby does not disappear neatly into a small corner of the diaper bag.

    The waistband, buckles and padding give it structure, but they also make it significantly bulkier than the Boba Wrap. That said, it is lighter and much less bulkier than the other structured carriers we tried.

    The current official price is substantially higher than the price of other structured carriers.

    The value came from how long we used it and how comfortable it was for all 3 of us, not because it was an inexpensive purchase.

    The current Omni Classic is marketed for newborns who meet the minimum weight and height requirements.

    However, older Omni 360 or Classic versions may have different insert instructions, and the current Ergobaby guidance is not completely consistent across its own pages.

    Check the label and manual for the exact carrier you own.

    Even with a newborn-compatible model, I still preferred the softness of the Boba during the fourth trimester.

    It was easier than wrapping, but not completely adjustment-free.

    If my husband used it after me, we usually had to change the strap settings before the fit felt right.


    Boba Wrap vs Ergobaby Omni Classic

    Choose the Boba Wrap if:

    • your baby is in the newborn or early-month stage
    • you want the closest, softest carry
    • your baby craves constant contact
    • you expect frequent contact naps
    • you want a lower-cost first carrier
    • you do not mind practising the tying technique

    Choose the Ergobaby Omni Classic if:

    • your baby is becoming heavier
    • Its hot and your baby is overheating in the Boba
    • the stretch of a wrap no longer feels supportive
    • you want a faster buckle-on setup
    • you prefer a structured waistband for back support
    • you want front, hip and back carrying options
    • you want one carrier that can continue into toddlerhood

    Choose both if:

    You are building your baby kit before birth and want two carriers that solve different problems.

    The Boba covers the soft newborn stage.

    The Ergobaby covers the structured, heavier-baby stage.

    Buying both is not necessary for every family. But for us, using them in sequence made more sense than trying to force one carrier to feel perfect at every stage.


    Which one should you buy first?

    If I were starting again, I would buy the Boba Wrap first.

    That was the one we wanted during the contact-heavy fourth trimester.

    I would add the Ergobaby later, when the wrap began feeling less supportive and carrying her weight became harder on my body.

    That timing will not be identical for every baby.

    Boba officially rates its wraps up to 35 lb, but also notes that they generally work best up to approximately 20 lb. Your transition may happen earlier or later depending on your baby’s size, your body, the length of each carry and how supportive the wrap feels when tied correctly.

    Do not transition because a calendar says five months.

    Transition when the wrap stops feeling secure and comfortable for you.


    One thing I would do differently

    I would practise the Boba before the baby arrived.

    Seriously.

    One proper practice session with a rolled towel would have saved us from trying to understand several metres of fabric while exhausted and holding a crying newborn.

    The first time you use the wrap should not also be the first time you have ever tied it.


    The bottom line

    We did not choose between the Boba Wrap and the Ergobaby Omni Classic.

    We used them in sequence.

    The Boba gave us softness, closeness and calmer contact naps during the newborn months.

    The Ergobaby gave us structure, easier weight distribution and a carrier we could continue using as she grew.

    I would make the same choice again.

    📌 Save this for anyone trying to solve the carrier question before the baby arrives.

    Also on Mama Rooted

    ⚠️ Affiliate Disclosure: This post contains affiliate links. I may earn a small commission at no extra cost to you.

  • What Actually Goes in the Diaper Bag — and What You Can Leave at Home

    What Actually Goes in the Diaper Bag — and What You Can Leave at Home

    ⚠️ Affiliate Disclosure: This post contains affiliate links. I may earn a small commission at no extra cost to you.

    There is a specific kind of panic that happens in a restaurant bathroom when the baby needs a change and you are elbow-deep in the diaper bag trying to find the cream.

    You are rummaging past three muslin cloths, two spare outfits, the toy you packed just in case, and something you forgot you even put in there.

    I overpacked our diaper bag for the first two months.

    Then I did a proper edit.

    I kept what we actually reached for, took out everything else, and going out became genuinely easier.

    This is that edit: what goes in, what stays home, and the diaper bag that made the whole system work.


    The bag — get this right first

    We used the Astro Alan Diaper Bag Backpack, and I genuinely loved how functional it was.

    It had 19 pockets, but more importantly, the pockets actually made sense. Not just random compartments where things disappear — actual spaces that fit the things you need.

    The front pocket had insulated lining for a bottle. There was a USB charging port on the side. The built-in waterproof changing station folded out and clipped back in without becoming a whole production. It had stroller straps, so it could hang off the pram hands-free.

    And it looked like a normal backpack.

    That part mattered more than I expected.

    Because the diaper bag that looks good and works well is the one you actually grab on the way out.

    Do not underestimate that.


    What actually goes in — and stays in

    These are the things we reached for on almost every outing.

    Not the “maybe we’ll need this once someday” items.

    The actual, useful, worth-the-space things.


    Bottles

    Milk bottles in the front pocket insulated for prolonged freshness. Use whichever bottle your little one prefers.

    Mine preferred the Dr. Brown’s natural flow Anti colic ones.


    Diapers — 3 to 4

    Not two.

    Not one “just in case.”

    Three minimum.

    Blowouts happen in sequences, and the day you pack light is always the day you regret it.


    Wipes — travel pack, always refilled

    A travel-size wipe pack is enough for most outings, as long as you actually refill it.

    I kept ours in the same side pocket every time because muscle memory matters when you are changing a wriggling baby on a public changing table.

    The key is not carrying the biggest pack.

    The key is knowing exactly where the wipes are without searching.

    Don’t forget to get anti bacterial hand wipes or travel sized sanitizer. I needed more times than I would care to count.


    Portable changing mat

    Even with a diaper bag that has a built-in changing station, I still liked having a portable changing mat inside.

    The Tiny Twinkle Secure Grip Waterproof Changing Pad folds flat, wipes clean, and gives you a clean surface anywhere.

    Public bathroom changing tables are not something I wanted to put my baby directly on.

    This solved that.


    Diaper cream — travel size

    Not the full tub.

    A travel-size Boudreaux’s Butt Paste or a small decanted amount is enough.

    I used diaper cream preventatively during changes on the go because it was easier than dealing with irritation later.

    Small tube. Same pocket. Always there.


    Disposable diaper bags

    These are not exciting, but they solve a very real problem.

    When there is no bin nearby, or the bin is not somewhere you want to leave a diaper loose, disposable diaper bags are useful.

    They take up almost no space and make outings less stressful.


    One spare onesie — sized up

    One.

    Not three.

    If you need more than one spare outfit, you are probably heading home anyway.

    I liked keeping one slightly bigger onesie in the bag because blowouts were the main reason we needed it, and a snug outfit only made that situation worse.

    Fold it flat. Keep it in the same pocket. Replace it as soon as it gets used.


    One muslin cloth

    Not four.

    One good muslin cloth does a lot.

    It works for spit-up, shade, an impromptu nursing cover, or a backup changing layer.

    The Comfy Cubs muslin cloths fold down small, dry quickly, and are much more useful than a tiny burp cloth.


    Nipple cream — if breastfeeding

    If you are breastfeeding, keep a small Lansinoh nipple cream tube in the diaper bag.

    Feeds happen on the go.

    And this should not be the thing you reach home wishing you had packed.

    A small tube in the front pocket was enough.


    Pacifier — in the case

    If your baby takes one, keep a pacifier in a case.

    Not loose in the bag.

    Not floating around with snack crumbs, receipts, wipes, and everything else.

    We used the Philips Avent Soothie, and I kept it clipped inside a pocket so it did not disappear to the bottom of the bag.


    Snack and water — for you

    Breastfeeding thirst and hunger do not stop just because you are out of the house.

    I always liked having:

    This is where the diaper bag being roomy actually mattered.

    The HydroJug Traveller or a similar large tumbler in the side pocket made outings easier because I was not relying on finding water once we were already out.


    Portable sound machine

    The Hatch Go was useful because naps do not always happen at home.

    It clipped to the diaper bag or pram and gave us white noise wherever we landed — car rides, grandparents’ house, a walk, a corner of someone’s living room.

    It was not a magic sleep fix.

    It was just one familiar sound in an unfamiliar place.


    Phone charger

    A long cable or small charging setup is one of those things you do not think about until your phone is dying during a long outing.

    The Astro Alan bag has a USB port on the outside, so you can keep a power bank inside and run the cable through the port.

    Small detail. Very useful.

    Especially when you are using your phone for maps, photos, messages, feeding timers, or just staying awake during a long feed.


    What stays home

    These are the things I packed religiously at first and barely used.

    Once I removed them, the bag felt lighter and easier to use.


    Full pack of wipes

    The travel pack is enough for normal outings.

    If you truly run out, you can usually buy more. A full pack adds bulk fast.


    More than one spare outfit

    One spare outfit is useful.

    Three is fear-packing.

    If you are dealing with multiple outfit-level disasters, the outing is probably over anyway.


    Multiple toys

    One small favourite is enough.

    The rest can live in the pram or car seat. The diaper bag does not need to become a toy bin.


    Full-size creams or lotions

    Travel size only.

    Full tubs take up too much space and make the bag heavier than it needs to be. Decant, buy small, or keep the full-size version at home.


    The bulb aspirator

    I know it feels like something you should carry.

    But for regular outings, we never used it. The NoseFrida lived at home.


    Formula “just in case”

    This depends on your feeding situation.

    If your baby is formula fed, of course pack what you need.

    But if your baby is not formula fed, packing formula every single day “just in case” adds weight for a scenario that may be very unlikely.

    I would only pack it for longer outings, remote places, or days when I knew we might be out much longer than planned.


    The diaper bag edit rule

    Here is the rule that finally helped:

    The bag should feel light enough that you actually want to pick it up.

    It should not feel like you are packing for a three-day trip every time you leave the house.


    One bag, one grab, everything covered

    The diaper bag that works is the one already packed when you need to leave.

    That means:

    • everything has a pocket
    • everything gets refilled when you get home
    • nothing inside is dead weight

    The Astro Alan made this easier because the pockets actually made sense.

    After a week, I knew exactly where everything was without looking.

    That is the bar.

    One bag. One grab. Everything covered. You’ve got this Mama!

    📌 Save this and use it to edit your diaper bag before the next outing.


    Also on Mama Rooted

  • The Baby Diaper Caddy Setup That Went Everywhere With Us

    The Baby Diaper Caddy Setup That Went Everywhere With Us

    ⚠️ Affiliate Disclosure: This post contains affiliate links. I may earn a small commission at no extra cost to you.

    Our diaper caddy wasn’t just for diapers.

    It was the thing we grabbed before moving from the bedroom to the living room, before leaving for the car, before sitting down for a long feed, before anything that might turn into, wait, where is the…?

    It travelled with us — bedroom, living room, sometimes the car. And because it went everywhere, it ended up holding a lot more than diapers and wipes.

    The goal was simple:

    Here’s exactly what lived in ours — and why each thing earned its spot.


    The caddy

    We used the Parker Baby Diaper Caddy Organizer.

    What I liked most was that it had enough structure to stay upright, even when it was half empty. The handles were sturdy, the compartments actually helped, and it didn’t collapse into one big messy pile after a few days.

    That mattered because this caddy moved constantly.

    It wasn’t something we styled once and left untouched in a corner. It was used, restocked, carried, opened, rummaged through, and grabbed without thinking.


    Diapering essentials

    This was the core of the caddy — the things we reached for every single day.

    I kept:

    The changing pad was especially useful because we were not always changing her in the same spot. Sofa, bed, car, someone else’s house — the caddy made it feel less chaotic.


    Feeding

    The one feeding item that absolutely lived in the caddy:

    If you are breastfeeding, this is not something you want across the room. I kept one in every major feeding spot, and the caddy always had one too.

    In those early weeks, I used it constantly. After feeds, before things got worse, and especially when everything still felt tender and new.


    Comfort and cleanup

    This section became more important than I expected.

    I kept:

    The burp cloths were the thing I underestimated most. One or two is never enough. Keep a stack. You will use them.


    Spare clothes

    I always kept:

    Nothing fancy. Just soft, easy onesies sized up slightly.

    Because blowouts never happen when you are conveniently standing beside the dresser. They happen when you are settled, tired, or already running late.

    A spare outfit in the caddy saved us more than once.


    Comfort items

    A few little things made the caddy feel complete:

    The plushie was useful when we were moving from room to room or settling somewhere unfamiliar. The pacifier stayed clipped to the side so it didn’t disappear into the bottom of the caddy.


    Sleep on the go

    For naps, travel, and moving around the house, we kept:

    This clipped onto the caddy and came with us wherever we landed.

    Living room nap. Car ride. Grandparents’ house. Random corner where the baby finally started settling.

    White noise was one less thing to think about.


    For long feeds and leaving the house

    This was the part of the caddy that was technically for me — but honestly, it mattered.

    I kept:

    • Kindle — for long feeds and waiting rooms
    • HydroJug Traveller — filled before we left a room
    • Snacksprotein bars, dates, anything one-handed
    • Phone charger — long cable, never left behind

    The snacks were not optional. Newborn days have a way of making you suddenly starving at the worst possible time.

    And the water bottle had to be filled before I sat down. Every time.


    How we kept it from becoming chaos

    A diaper caddy can become a junk drawer very quickly.

    Three small habits made the biggest difference.

    1. Everything had a designated pocket

    Diapers and wipes went in the main compartment. Small items like cream, sanitiser, and pacifiers stayed in side pockets. Clothes and swaddles were folded flat at the bottom.

    If everything has a place, you can refill it without thinking.

    2. We restocked immediately after use

    Empty diaper pack out, new one in.

    Same day. Not “later.”

    Later is how the caddy becomes useless right when you need it.

    3. We kept one version for home and one for the car

    This was not aesthetic. It was practical.

    Having a duplicate of the essentials meant we were not constantly raiding one caddy to fill another. The home caddy stayed stocked. The car caddy stayed stocked.

    That small bit of preparation saved so much mental energy.


    Why it worked

    The caddy was not precious or perfectly styled.

    It was the bag we grabbed without thinking — and it almost always had what we needed.

    That was the whole point.

    Aesthetic matters, but functional matters more. Get a caddy with real structure, fill it with the things you actually reach for, and keep it stocked.

    Everything else is just nice to have.

    If I were building one again, I would keep the same rule:

    One caddy. One grab. Everything covered. No second trips.

    📌 Save this and build yours before the baby arrives. Lots of love, Mama Rooted.


    Also on Mama Rooted

  • The Postpartum Feeding Station I was so glad I set up before baby

    The Postpartum Feeding Station I was so glad I set up before baby

    ⚠️ Affiliate Disclosure: This post contains affiliate links. I may earn a small commission at no extra cost to you.

    The first few weeks of feeding a newborn — whether you’re breastfeeding, pumping, bottle feeding or all three — happen around the clock.

    You will feed on the sofa. In bed. On the nursing chair at 2am. In positions you didn’t know your body could hold. For stretches of time that blur together.

    The one thing that makes all of it more survivable: having everything you need within arm’s reach before you sit down.

    Because once the baby latches — or once you’ve got the bottle angle right and she’s finally settled — you are not getting up. You are not asking anyone to bring you anything. You are sitting there until she’s done.

    Set up your feeding station before the baby arrives. Third trimester you has the time. Postpartum you will not.

    First — where does the station live?

    Pick the spot where you’ll actually spend most of your feeding time. For most moms that’s one of three places:

    • A dedicated nursing chair in the nursery — if you have space and you’re planning to use it
    • A comfortable armchair or sofa corner in the living room — where you’ll be during the day
    • Your side of the bed — for night feeds, this is where the postpartum cart already lives

    Ideally you set up a version in all three places. A full station at your main daytime spot, a pared-down version next to the bed for nights. The items are largely the same — it’s just about which things need to be where.

    The chair — worth getting right

    You will spend hundreds of hours in this chair in the first year.

    The most important thing is back support. Breastfeeding without proper support — hunching forward, craning your neck to see the latch — leads to shoulder and neck pain that compounds over weeks. A chair with a proper back, armrests at the right height, and enough room to shift position during a long feed is not a luxury. It’s functional.

    If you already have a comfortable armchair that works, use it. If you’re choosing one specifically for feeding, look for:

    • A straight, supportive back — not a deep sink-in sofa
    • Armrests at roughly the height of your elbows when seated
    • Enough seat depth that you can sit with your back against the backrest and still have feet flat on the floor
    • Easy to wipe clean — spills are guaranteed

    The Graco Glider Elite Gliding Chair and the DaVinci Olive Upholstered Swivel Glider are both well-reviewed options with the support and cleanability you need.

    The nursing pillow — non-negotiable

    Do not try to hold the baby at the right feeding height with just your arms for weeks on end. Your shoulders will not survive it.

    A nursing pillow wraps around your waist and brings the baby up to breast or bottle height, freeing your arms and keeping your back in a neutral position. I used mine at every single feed for at least 8 months.

    The Boppy Original Nursing Pillow is the most recommended and the one I’d choose. The My Brest Friend Nursing Pillow is a good alternative with a firmer, flatter surface that some moms prefer for latch positioning.

    Water — more than you think you need

    Breastfeeding thirst is its own category of desperate. It hits mid-feed when both hands are occupied and you cannot do anything about it.

    Keep a large insulated tumbler at the station — filled before you sit down, every single time. The HydroJug Traveller 40oz keeps water cold for hours and the straw means you can drink without adjusting position or dislodging the baby. This is the one I used every day.

    Rule: fill it before you sit down. Every time. Without exception.

    Snacks — one-handed and within reach

    Breastfeeding burns hundreds of extra calories a day. Your body is working constantly. Hunger hits fast and hard, especially at night.

    Keep snacks at the feeding station that:

    • Can be eaten with one hand
    • Don’t require unwrapping or preparation
    • Are actually filling — not just something to chew

    What worked for us:

    • RXBAR Protein Bars — no wrapper fuss, genuinely filling, clean ingredients
    • Kind Protein Bars — easy to eat one-handed, good variety
    • Medjool Dates — natural sugar, iron, easy to grab one at a time
    • A small jar of nut butter with a spoon — sounds odd, works brilliantly at 3am

    Burp cloths and muslins — more than you think

    You will go through more burp cloths per day than seems possible. Keep a proper stack at the station — not one or two, a stack.

    Muslin cloths are better than standard burp cloths for this job. They’re large enough to actually protect your shoulder, absorbent, and dry fast between uses.

    The Comfy Cubs Muslin Burp Cloths are the ones I’d recommend — bigger than standard, soft, and they hold up to constant washing. Keep at least six at the station.

    Nipple cream — at every seat, not just one

    If you’re breastfeeding: nipple cream should be within arm’s reach at every single place you feed. Not in the bathroom. Not in the nappy bag. Right there.

    Apply after every feed in the first weeks — before the pain starts, not after. Lansinoh HPA Lanolin Nipple Cream is the one I used. Baby-safe, no need to wipe off before feeding, and the difference between using it and not using it in week one is the difference between manageable and miserable. Another thing I used along with it was the Earth Mama Nipple butter. Very moisturizing and soothing.

    The extras that matter more than you expect

    A few small things that round out the station:

    • Phone charger. Long cable, plugged in. You will be on your phone at every feed. Running out of battery at 3am with a baby attached is its own category of miserable.
    • Kindle. If you like reading like me, having a Kindle on hand makes the day feeds a little more manageable.
    • A small basket or caddy for everything. The Parker Baby Diaper Caddy works brilliantly here — use it to corral the snacks, cream, burp cloths and phone charger so nothing migrates.
    • Haakaa silicone pump. If you’re breastfeeding, keep the Haakaa at the station. Attach to the opposite breast at every feed and catch the letdown passively. Thirteen dollars. Builds a freezer stash without trying.
    • Hatch Go sound machine. For nap feeds where you’re trying to settle without fully waking, the Hatch Go Portable clips onto the chair and keeps the white noise going wherever you move.

    The night version — pared down for 3am

    At the bedside, you don’t need everything. You need the essentials and nothing that requires thought:

    • Water tumbler — filled before bed, every night
    • Two or three burp cloths — folded and stacked
    • Nipple cream — within reach without turning on a light
    • One protein bar or handful of dates — for the 3am hunger
    • Phone charger plugged in
    • Hatch nightlight at its lowest setting — enough to see by, not enough to wake you both up properly

    The night station rule: if you have to get up to get it, it doesn’t belong on the night station. Everything you need at 3am should be reachable without leaving the bed.

    Set it up before the baby comes

    I set up our main feeding station at around 34 weeks. By the time I came home from the hospital, everything was already in its place.

    Every feed for the first six weeks, I sat down and everything I needed was right there. No asking anyone. No getting up. No thinking.

    That’s the whole point of setting it up early. The less you have to think during a feed, the more energy you have for everything else.

    Set it up now. Postpartum you will be very glad you did. Lots of love, Mama Rooted.

    📌 Save this and send it to anyone building a feeding station for the first time.

    Part of the Mama Rooted postpartum prep series:

    The postpartum cart — everything on mine, tier by tier

    The nesting party checklist — what to ask people to do before baby arrives

    My first 40 days morning routine

    Amazon Subscribe and Save — what to set up before baby arrives

    My Honest Postpartum Recovery Must Haves

  • What to Put on Amazon Subscribe & Save Before Baby Arrives

    What to Put on Amazon Subscribe & Save Before Baby Arrives

    ⚠️ Affiliate Disclosure: This post contains affiliate links. I may earn a small commission at no extra cost to you.

    There is a specific kind of 11pm panic that every new parent knows.

    You reach for the wipes. The pack is empty. The backup pack you were sure you had is also empty. And tomorrow morning there will still be a baby who needs changing.

    Amazon Subscribe & Save is the thing that stopped this from happening to us.

    It is not glamorous. It is not a cute baby product. It does not photograph well for a registry flat lay.

    But for the things you use constantly — wipes, diaper cream, dish soap, supplements, one-handed snacks — it quietly removes a whole category of mental load.

    Set this up before the baby arrives.

    Third trimester you has the headspace for it.

    Postpartum you does not.


    How Amazon Subscribe & Save works

    On eligible Amazon products, you will usually see a Subscribe & Save option near the regular purchase button.

    You choose how often the item arrives, how many you want, and when the first delivery should come. Then Amazon sends it automatically on that schedule.

    You can usually skip, pause, change the frequency, adjust the quantity, or cancel through your Amazon account.

    The discount varies by product, category, and current Amazon terms, so always check the savings shown on the product page before subscribing. Some items offer a small discount, and some orders qualify for higher savings when multiple subscriptions arrive together.

    The real benefit is not just the discount.

    It is not having to remember one more thing when you are running on broken sleep.


    The 5 subscriptions I would set up first

    If you do nothing else, start with these:

    1. Baby wipes
    2. Diaper cream
    3. Bottle and pump-part dish soap
    4. Postnatal supplements
    5. One-handed snacks

    Diapers can be useful too, but sizing changes fast. I would set a reminder to review diaper size every few weeks instead of blindly subscribing too far ahead.


    Baby wipes

    You go through more wipes than seems physically possible.

    Not just for diaper changes. For spit-up, hands, faces, car seats, changing mats, and whatever mysterious sticky thing is suddenly on the sofa.

    What I’d do:
    Subscribe to a bulk pack and set the first delivery for 2–3 weeks before your due date.


    Diaper cream

    Diaper cream is one of those things you do not want to discover is empty after the rash has already started.

    I liked having one open and one backup.

    What I’d do:
    Keep one in the diaper station and one in the postpartum cart. Subscribe if it is a product you already know you like.


    Nipple cream

    If you are breastfeeding, nipple cream is one of those tiny things that ends up everywhere.

    Nightstand. Nursing chair. Postpartum cart. Diaper bag. Sofa.

    I used it after feeds and hated being without it.

    What I’d do:
    Buy more than one tube and keep them where you actually feed.


    Postnatal supplements

    This is exactly the kind of thing you are likely to forget to reorder when you are sleep deprived.

    If you already have a postnatal supplement your provider is happy with, put it on subscription before baby arrives.

    What I’d do:
    Set the delivery frequency based on the bottle size, then review after the first month.


    The less obvious things worth adding

    These are not always on baby-prep lists, but they made a real difference in our house.

    Bottle and pump-part dish soap

    If you are washing bottles, pacifiers, pump parts, Haakaa pieces, or toddler cups, dish soap disappears fast.

    A fragrance-free or baby-safe option was one of those boring things I was glad not to think about.

    Disposable breast pads

    If you are breastfeeding, leaking can be constant in the early weeks.

    Have one box ready before your due date. Subscribe later only if you are actually using them often.

    One-handed snacks

    Breastfeeding hunger is its own category of desperate.

    Protein bars, nuts, dates, energy bites — whatever you will actually eat with one hand — are worth having before baby arrives.

    Fragrance-free laundry detergent

    Baby clothes, muslins, burp cloths, swaddles, sheets, towels — the laundry becomes absurd very quickly.

    A gentle, fragrance-free detergent is one of those household basics that suddenly becomes a baby essential.

    Household staples

    Coffee. Toilet paper. Hand soap. Dish soap. Bin bags. Paper towels.

    These sound too basic to mention, but running out of them with a newborn and no sleep is miserable.

    Take ten minutes before baby arrives and subscribe to the household staples you already use regularly.

    Not because they are exciting.

    Because future you should not have to think about them.


    What I would not put on Subscribe & Save before baby arrives

    This is where it is easy to overdo it.

    Subscribe & Save is useful when it removes predictable, recurring needs from your brain.

    It is not useful when you subscribe to things before you know whether they work for your baby.

    Do not over-subscribe to one diaper size

    Babies grow fast. Fit changes. Brands fit differently.

    Start small and review often.

    Do not subscribe to formula before you know what baby tolerates

    Unless your provider has already recommended a specific formula and you know it works for your baby, wait.

    Formula preferences and tolerance can change.

    Do not bulk-subscribe to bottles or pacifiers

    Some babies are picky.

    Buy a small starter amount first. Subscribe only once you know what your baby accepts.

    Do not subscribe to skincare before testing it

    Newborn skin can be sensitive.

    Try one product first before committing to repeat deliveries.

    Do not subscribe to anything you are not actually using monthly

    A subscription is only helpful if it removes mental load.

    If it creates clutter, skip it.


    How to set it up quickly

    This is simple enough to do in one sitting.

    1. Search for the product on Amazon.
    2. Choose the Subscribe & Save option if it is available.
    3. Pick a delivery frequency.
    4. Set the first delivery for 2–3 weeks before your due date.
    5. Add a reminder to review everything after the baby arrives.

    Start with monthly for high-use items like wipes.

    Use every 2–3 months for slower items like detergent, soap, or supplements.

    Then review it once you know your baby’s actual rhythm.


    Make this a nesting party task

    This is a perfect job for someone who wants to help but does not know what to do.

    Ask a partner, sibling, or tech-comfortable friend to sit with you and set it up before your due date.

    Give them the list.

    Let them help you remove repeat purchases from your head.

    This is exactly the kind of practical, invisible support that actually matters.

    Not just gifts.

    Not just cute clothes.

    Systems that keep working after everyone goes home.


    The honest reason this is worth doing

    The mental load of new parenthood is relentless.

    The knowing what needs restocking. The tracking what is running low. The 11pm panic when something essential is suddenly empty.

    Subscribe & Save does not solve all of it. But it quietly removes a whole category of it.

    Set it up once. Review it when your baby grows.

    Let the boring things arrive without needing a place in your head.

    That is the whole point.


    Get the free Nesting Party Checklist

      We respect your privacy. Unsubscribe at anytime.

      No Spam. Just practical postpartum and baby-prep resources from Mama Rooted.

      📥 Want this as part of a bigger pre-baby prep list?
      Download the free Mama Rooted Nesting Party Checklist — it includes Subscribe & Save setup, postpartum cart, feeding station, freezer meals, house prep, and the small tasks people can actually do before baby arrives.

      📌 Save this and set it up this week. Post partum you will thank the third trimester you. Lots of love, Mama Rooted.


      Also on Mama Rooted

    • 22 Baby Registry Items We Used Every Single Day (All Under $50)

      22 Baby Registry Items We Used Every Single Day (All Under $50)

      ⚠️ Affiliate Disclosure: This post contains affiliate links. I may earn a small commission at no extra cost to you.

      I registered for a wipe warmer.

      A designer nappy bag that looked beautiful hanging on the pram and permanently stayed empty.

      A bath thermometer shaped like a duck.

      Meanwhile the things that actually carried us through the newborn stage were:
      the $13 silicone pump beside the bed,
      the extra muslin cloths I washed constantly,
      and the little tube of nipple cream I bought at 2am.

      So this isn’t the aspirational registry list.

      It’s the practical one.

      The 3AM Test

      Ask yourself these 5 questions before deciding what actually should go on your registry.

      • Can I use it with one hand?
      • Does it solve a real problem?
      • Will I reach for it half-asleep?
      • Is it easy to clean?
      • Does it make postpartum easier for me too?

      The products here are ones that genuinely earned their space in our house — the things we reached for over and over during the exhausted, blurry, milk-stained first few months.

      Everything here is under or around $50 depending on Amazon pricing. If you want to skip the reviews and go directly to the list, scroll to the end of the post for the full list.


      🍼 Diapering and Nappy Changes

      Pampers Swaddlers or Huggies Size 2

      Register for multiple sizes, not just newborn.

      We ended up preferring Pampers early on because the wetness indicator made sleep-deprived middle-of-the-night changes easier. Later, Huggies fit better once the baby got chunkier.

      This is one of those categories where you do not know what works until the baby is actually here.

      Huggies Natural Care Sensitive Wipes

      One of the least exciting registry items and somehow one of the most used.

      Fragrance-free wipes, thick enough not to shred immediately, and gentle on irritated newborn skin.

      Register for more than you think you need.

      Then add more.

      Boudreaux’s Butt Paste Maximum Strength

      We started using this diaper rash cream at the first sign of redness instead of waiting for a full rash to develop.

      That alone probably saved us several miserable nights.

      Tiny Twinkle Waterproof Changing Pad

      This changing pad lived permanently in the nappy bag.

      You imagine you’ll mostly change diapers at home. You will not.

      Frida Mom Instant Ice Maxi Pads

      Postpartum recovery products are criminally under-discussed.

      These were one of the first things that made me feel physically human again after delivery.


      Best Feeding and Breastfeeding Essentials

      Boppy Original Nursing Pillow

      One of the highest-use items from our entire registry is this nursing pillow.

      Saved my back during cluster feeding weeks and made positioning dramatically easier when I was still learning how to breastfeed comfortably.

      Medela Harmony Manual Breast Pump

      I used this pump far more than I expected to.

      Quiet, lightweight, and genuinely useful for quick relief without dragging out an entire electric pump setup.

      Especially good beside the bed during early postpartum engorgement.

      Haakaa Silicone Breast Pump 100ml

      This is probably the cheapest item on this list relative to how much I used it.

      I slowly built an entire freezer stash from passive letdown alone without ever intentionally pumping.

      Dr. Brown’s Natural Flow Anti-Colic Bottles Starter Set

      We introduced bottles slowly and these worked well without creating an obvious bottle preference early on.

      Also noticeably helped with gas compared to some simpler bottle designs we tried later.

      Boon Lawn Countertop Drying Rack

      At some point your kitchen quietly becomes a bottle-washing facility.

      This drying rack at least stopped ours from looking chaotic.

      Lansinoh Lanolin Nipple Cream

      I used this after almost every feed during the first few weeks.

      One tube is not enough.

      Philips Avent Soothie Snuggle Pacifier Holder

      I thought this looked slightly ridiculous before having a baby.

      Turns out the attached plush on the holder actually makes it much easier for babies to find and hold independently later on.


      Clothing and Swaddling Essentials That Actually Matter

      Simple Joys by Carter’s Zip-Up Sleepsuits

      Zip.

      Not snap.

      This will become one of your strongest opinions as a parent very quickly and these sleepsuits – a necessity.

      Comfy Cubs Muslin Swaddle Blankets

      Probably the most versatile blankets we owned:
      swaddle,
      burp cloth,
      light blanket,
      nursing cover,
      pram shade,
      tummy-time mat.

      I bought prettier baby items.

      These were the ones constantly in use. You could also consider getting the easy swaddle ones. They were quite useful in the first 2 months.

      Comfy Cubs Muslin Burp Cloths

      Bigger than standard burp cloths and much better for actual newborn messes.

      We reached for these constantly.


      Bath and Grooming Essentials Worth Registering For

      Bunwag Baby Bathtub Collapsible

      This Bathtub folds flat and doesn’t permanently occupy your bathroom.

      That alone made it worth it.

      Momcozy Core Baby Kit

      Tiny newborn nails somehow grow overnight and immediately become razor sharp.

      Having everything in one kit mattered more than I expected.

      Frida Baby NoseFrida Nasal Aspirator

      The first time your newborn gets congested is terrifying.

      Nosefrida cleared stuffy noses faster than the bulb aspirators we tried and made feeding noticeably easier during colds.


      Sleep and Baby Carrying Essentials

      Hatch Go Portable Sound Machine

      One of the few baby products that genuinely helped sleep feel more predictable outside the house.

      Especially useful for pram naps and car naps.

      Boba Baby Wrap Carrier

      The newborn stage can feel physically impossible because babies want to be held constantly.

      This carrier gave me my hands back without feeling bulky or structured.


      Registry Organisation Items

      Astro Alan Baby Diaper Bag with Changing Station

      Lots of compartments without becoming impossible to find things inside.

      Also this diaper bag looked reasonably normal instead of aggressively “baby.”

      Parker Baby Co. Diaper Caddy Organiser

      One of the few “organisation” products that genuinely made life easier.

      This Caddy migrated room to room for months — diapers, wipes, cream, spare clothes, burp cloths all in one place instead of scattered around the house.


      Things I’d Skip Next Time

      • Wipe warmers
      • Fancy nursery decor
      • Baby shoes before walking
      • Complicated newborn outfits
      • Anything designed mainly to look good in photos

      The newborn stage is survival mixed with tenderness.

      You need products that reduce friction. Not products that create more of it.


      The Honest Truth About Baby Registries

      The products that mattered most were rarely the expensive ones.

      Usually they were the things that solved a problem at 2am with one hand free:
      the Haakaa beside the bed,
      the nipple cream in every room,
      the extra muslin cloths draped over literally everything.

      That’s the stuff that earns its place in a real postpartum home.

      Not the things that just photograph well in a perfectly styled nursery. You have got this mama. – Love, Mama Rooted.

      Quick Recap

      📌 Save this for later or send it to someone building a registry right now.

    • How We Gently Night Weaned  (Without a Single Night of Crying It Out)

      How We Gently Night Weaned (Without a Single Night of Crying It Out)

      ⚠️ Affiliate Disclosure: This post contains affiliate links. I may earn a small commission at no extra cost to you. I only recommend things I personally used or carefully researched.

      There is a quiet point in your postpartum journey where night feeding shifts from a nutritional necessity to almost entirely about comfort. If you co-sleep and breastfeed to sleep, the thought of ending those night feeds can feel terrifying—especially if you refuse to use traditional sleep training methods.

      When my daughter hit nine months, I knew my body, my sleep, and my days were ready for a shift. But I was absolutely clear about one thing: I was not going cold turkey. I was not going to remove something she depended on overnight and leave her nervous system to figure it out alone.

      Instead, we did it slowly. So slowly it almost felt like nothing was happening. And then one day, around twelve months, I realized she hadn’t woken in the night in days.

      If you are currently in the thick of 2:00 AM wake-ups and dreading what comes next, here is the exact, three-phase framework we used to gently end night feeds on her timeline—and ours.

      Phase one: shorter feeds, not fewer

      I started with duration, not frequency. Instead of trying to drop a full feed, I just shortened each one.

      Five minutes became three.

      Three became two.

      Two became one.

      This took weeks, not days. I waited until each shorter duration felt settled and normal before I reduced it again.

      She barely noticed the early reductions — going from five minutes to three didn’t seem to register for her at all.

      The Phase 1 Protocol

      • The Goal: Reduce the duration of the feed, not the number of wake-ups.
      • The Pace: Hold at each new time limit for 5–7 days before dropping another minute.
      • The Method: Don’t guess the time in the dark. Use the dim clock on your baby monitor or the faint glow of your nightlight to track minutes accurately.

      It was only when we got down to around a minute that she started to notice something was different. At the one-minute mark, she’d come off the feed still unsettled—still needing to transition back to sleep. That’s when we moved into the next phase.

      Phase two: replacing the feed with another comfort

      I stayed with her and offered something else — patting her back slowly, rocking gently, singing the same songs from her bedtime routine.

      I want to be honest: this part was harder.

      Not dramatically hard, but harder.

      There were a few nights where she took longer to settle, where she fussed a bit before going down.

      We tried my husband taking over the settling at this stage to see if removing me from the equation would help. It didn’t — she was so attached to me for sleep that having him there instead of me made things worse, not better.

      She’d escalate immediately. So I stayed in it, which was tiring, but trying to force my husband into a role that confused and upset her felt counterproductive.

      What helped most during this phase:

      The white noise, always on. The Hatch Rest+ running all night masked the small sounds that would startle her awake just as she was drifting off. During the transition period when she was more easily disturbed, this mattered more than ever.

      The room staying dark. No lights, ever. The moment a light went on her brain would register waking and make settling ten times harder. We used the faint glow of the Hatch at its absolute lowest if I needed to see anything.

      Consistency in my response. I showed up the same way every time she woke — calm, quiet, present. I didn’t vary what I did or how long I stayed. Predictability was the whole point. She needed to know that I was still there.

      Phase three: dropping feeds one at a time, never all at once

      Once the shortened feeds felt stable I started reducing the number of wake-ups I’d feed at all — very gradually, one feed at a time, always keeping at least one comfort feed available.

      If she woke at 11pm and again at 2am and again at 5am, I might decide that the 11pm and 5am feeds would get the shortened but the 2am one — the deepest part of the night — stayed a full comfort feed for a while longer. Then over weeks, that one shortened too.

      This sounds more organised in writing than it was in practice.

      In reality it was intuitive and flexible. Some nights I fed more because she was teething or unwell or just seemed to genuinely need it.

      I didn’t hold rigidly to a plan on those nights. The gentleness was in the flexibility as much as the gradualness.

      By twelve months — she just stopped

      I didn’t have a moment where I declared the night feeds over. It was more that I noticed, one morning, that I couldn’t remember the last time she’d woken in the night.

      She had learned to self-settle.

      Not because we trained her to — because we gave her enough time and enough gradual change that her nervous system caught up on its own.

      She’d stir between sleep cycles, find her own way back, and sleep through. The comfort feed had become unnecessary because she’d built other ways of getting herself to sleep.

      I remember feeling two things simultaneously: relief and a small unexpected grief. That quiet intimacy of the night feeds — just the two of us in the dark — was over.

      I hadn’t known it was the last one when it happened.

      I wish I’d known.

      I’d have held on a little longer.

      The last feed — the bedtime one — at two years

      After the night feeds were gone, she kept one feed before bed.

      Part of the bedtime routine — after the bath, after the massage and the pyjamas, we’d read together (her favourites were Llama Llama Red Pajama and I Love You to the Moon and Back), then she’d nurse while I sang to her and said her affirmations, and then she’d sleep.

      That one stayed until she was two.

      About a month before I decided it was time, I started talking to her about it. Just casually, in the daytime, in plain language a toddler could understand.

      “Mama’s milk is going to go away soon. You’re such a big girl now. We’ll still have our bath and our songs and our cuddles — everything else stays the same. Just the milk is going to go.”

      I said some version of this most days for about a month. Not dramatically, not as a warning — just as information.

      Then one evening she just didn’t ask for it.

      We did the bath. The massage. The pyjamas. The songs. The affirmations. And she fell asleep.

      No request. No tears. No protest.

      The next night she did ask. I said, gently and calmly, that the milk was all gone now, that we’d talked about this, that everything else was still here. She looked at me for a moment. And then she lay down.

      That was it. Two years of breastfeeding, ended in a sentence.

      I cried a little, later, when she was asleep. She didn’t cry at all.

      Our 5 Favorite Bedtime Transition Books

      Replacing the nursing session with a highly engaging, rhythmic story is one of the best ways to ease a toddler away from the breast at bedtime. These are the five books that became our anchors:

      1. Llama Llama Red Pajama by Anna Dewdney: Her absolute favorite. The rhythmic, rhyming text is incredibly soothing, and she quickly learned every page by heart.
      2. I Love You to the Moon and Back by Amelia Hepworth: We ended almost every night with this one. It serves as a beautiful, calming love letter to the parent-child bond.
      3. Goodnight Moon by Margaret Wise Brown: A classic for a reason. The slow, quiet pacing and darkening illustrations genuinely help little ones wind down.
      4. The Rabbit Who Wants to Fall Asleep by Carl-Johan Forssén Ehrlin: This book uses specific, gentle repetition and psychological relaxation cues woven into the story. More than a few nights, I fell asleep reading it too.
      5. Time for Bed by Mem Fox: Soft, rhythmic, and full of animal babies settling down for the night. Perfect for the final, winding-down part of the evening.

      What I want you to take from this

      We live in a culture that has very strong opinions about when and how breastfeeding should end.

      There are people who will tell you that comfort feeding at night is a habit you’re creating, that you need to stop by six months, by nine months, certainly by one year.

      I want to offer you a different frame.

      When you wean when you are both ready — when you follow the baby’s cues and your own instincts — it doesn’t have to be dramatic. It doesn’t have to be traumatic.

      It doesn’t have to involve nights of crying that leave you wondering if you’ve damaged something in your child.

      My daughter is two. She is confident and secure and good at sleeping. She falls asleep after her routine, in her own space.

      She got there not in spite of how we handled the night feeds — but because of it.

      When we wean when we are ready instead of when society tells us we should stop, the process becomes much simpler. Trust yourself. Trust your baby. She knows more than the books do about what she needs from you.

      Read the full series:

      Part 1: I Breastfed for 2 Years — The Honest Truth About All of It — the beginning, the hard weeks, the silverettes and the 2am feeds

      Part 2: The 4-Month Sleep Regression Almost Broke Us — what the regression actually is and how we got through it without sleep training

      Part 3: This post — how we removed the comfort feed, gently and on her timeline

      📌 Save this post to your Pinterest boards. Come back to it on the hard nights, or send it to a mama who is currently in the thick of night feeds and dreading what comes next. You’ve got this, mama. — Lots of love, Mama Rooted.

    • The Aesthetic Postpartum Cart: Everything You Actually Need and How to Organise It

      The Aesthetic Postpartum Cart: Everything You Actually Need and How to Organise It

      ⚠️ Affiliate Disclosure: This post contains affiliate links. If you buy through my links I may earn a small commission at no extra cost to you. I only recommend things I have personally used or carefully researched.

      Can I tell you something that might sound a little extra?

      I had my postpartum cart fully set up before I hit 35 weeks. Every tier stocked, clear acrylic dividers keeping everything in its place, parked in the corner of my bedroom like it was ready for its close-up. My husband walked past it, looked at it for a long second, said absolutely nothing, and kept walking. By that point in the pregnancy he had learned.

      But listen — when I came home from the hospital with my tiny baby and my very battered, very tired body, that cart was one of the best things I had ever done for myself. Everything I needed was right there. I didn’t have to get up and dig through the bathroom cabinet at 3am. I didn’t have to ask anyone to find anything for me. I didn’t have to think.

      And when you have a newborn, not having to think is one of the greatest gifts you can give yourself.

      So today I’m walking you through exactly how I built mine — tier by tier — and why I made the choices I did. Some of this came from obsessive second-trimester research. Some of it I wish I’d known sooner. All of it is honest.

      🛒 In full nesting mode and don’t want to hunt everything down one by one? I linked every item from this post in my Amazon shopping list so you can head straight there as well!

      First: That Second Trimester Energy Is There for a Reason — Use It

      If you’re in the second half of your second trimester right now and suddenly reorganising your kitchen at 10pm for no clear reason — that’s nesting energy, and it is real and it is powerful and you should absolutely point it at this project.

      The version of you that exists right now — organised, energetic, still capable of a full sentence — she is the one who should be setting up the postpartum cart.

      I ordered things gradually over a few weeks so it didn’t feel like one big spend. A few items here, a few there. By the time I was close to my due date, the cart was already done and I felt like I had genuinely taken care of my future self. That feeling mattered.

      5 Things I would buy today to start

      Even if you don’t buys anything else from this list today, these are the 5 things I recommend you start with because these were my absolute lifesavers. I reached for them multiple times a day, every single day in those blurry first weeks.

      The Cart Itself

      I used a three-tier rolling cart with removable baskets and wheels so I could move it right next to wherever I was — the bed, the nursing chair, wherever I ended up camping for the day. The Pipishell 3-Tier Rolling Cart and the Simple Houseware Heavy Duty Metal Cart are very similar to what I used — sturdy, easy to put together, and nice enough to not look like a medical supply trolley sitting in your bedroom.

      Inside each tier I used clear acrylic organiser bins. This is the detail that made the whole thing work. Without the dividers, things slide around and pile up and you end up with chaos. With them, everything has a home, you can see exactly what’s there at a glance, and restocking is easy. For a sleep-deprived mom reaching for something in the dark — being able to just look and grab without digging is everything.

      Tier One: All the Baby Stuff

      My top tier was entirely for the baby. Everything for a nappy change, a feed, a spit-up situation — right there without me having to move.

      I didn’t want to be scrambling around looking for a clean burp cloth or realising the diaper cream was in another room. With a newborn, every little friction point adds up. Removing them in advance is how you protect your own energy.

      • Nappies / diapers: I kept about ten in the cart and restocked regularly. Pampers Swaddlers Newborn have a wetness indicator which sounds silly until you’re half asleep and genuinely can’t tell. The umbilical cord cut-out is also a small detail that matters a lot in those first weeks.
      • Wipes: Huggies Natural Wipes — nothing irritating on brand new skin. These are the ones for a newborn, full stop.
      • Changing mat: A small foldable waterproof mat meant I could do a quick change right on the bed without getting up. The Tiny Twinkle Portable Diaper Changing Pad is compact and wipes clean instantly.
      • Diaper cream: Boudreaux’s Butt Paste Maximum Strength — thick, effective, and I used it preventatively from day one rather than waiting for a rash to appear.
      • Change of clothes + burp cloths: Two or three sleepsuits folded and stacked (always zipped onesies). A small pile of Comfy Cubs Muslin Burp Cloths. Newborns go through both at a rate that will genuinely surprise you.

      Tier Two: Everything for Me

      This tier was mine. All the postpartum recovery essentials I needed access to constantly — day and night. Especially in those early weeks when getting out of bed felt like a whole project.

      Something I felt strongly about was that my needs lived on this cart alongside the baby’s. New moms have a habit — or maybe it’s just how it goes — of making sure the baby has everything within reach and then forgetting about themselves entirely. I made a deliberate choice not to do that.

      • Heavy duty pads: The postpartum bleeding is heavy. Regular pads are not going to cut it. Frida Mom Postpartum Pads are long, thick, and designed specifically for this. I kept a stack on the cart and restocked from the main supply as needed. Frida Mom Ice Maxi Pads were also a godsend during the first 2 weeks.
      • Haakaa: This $13 item alone build my entire freezer stash in the first few weeks, when my body was learning to regulate supply and oversupply was becoming the norm.
      • Disposable underwear: Frida Mom Disposable Postpartum Underwear — comfortable, high-waisted, and honestly just practical. I wasn’t precious about it. Your regular underwear will thank you.
      • Nipple cream: If you’re breastfeeding, this needs to be within reach at every single feed. I went through both Lansinoh HPA Lanolin Nipple Cream and Earth Mama Nipple Butter at an alarming rate in those early weeks. Apply after every feed without fail. Don’t wait until it hurts.
      • Water tumbler: The HydroJug 40oz with straw or Hydro Flask 32oz Wide Mouth kept water cold for hours and the straw meant I could drink without having to properly sit up with a baby on me. Fill it before bed. Refill when you wake up. That was my rule.
      • High protein snacks: Your body is healing, possibly producing milk, and running on not enough sleep. It needs real fuel. RXBARs, Kind Protein Bars and Munchkin Lactation Cookie Bites lived on this tier constantly. Easy to eat one-handed mid-feed, no mess, actually filling. The 2am hunger when you can’t put the baby down — having something right there is a small mercy.
      • Hair Tie and Brush: Trust me your hair would be a mess and getting up to comb it not something I wanted to do. The hair tie and brush made me feel human again.

      Tier Three: The Extras Bin

      My third tier held the things I needed less often but still wanted close — and this is where the acrylic bins really did their job. One bin for baby extras, one for my bits, one for feeding supplies. Nothing became a pile. Nothing got lost.

      • Frida Baby NoseFrida Nasal Aspirator — I know. The concept is odd. Use it anyway. You will reach for this more than you expect.
      • Baby Nail File and electric clipper — newborn nails grow fast and are surprisingly sharp. Having these on the cart means you can sort it the second you notice rather than putting it off and then forgetting.
      • Colace Stool Softener — I say this in every postpartum post and I will keep saying it. Start day one. No further explanation required.
      • Lansinoh Disposable Breast Pads — for leaking between feeds, especially while supply is still figuring itself out.
      • Amika Dry Shampoo — because some days a shower is not happening and feeling even slightly more like yourself matters for your mental health. This earns its place on the cart, no question.
      • CeraVe Moisturizer — Again something that helps us feel like ourselves just a little more. A little care goes a long way in uplifting our mood.
      • Laniege Lip Balm — For the exact same reason as the moisturizer, the dryness is real. Self care becomes important.

      What Was Already on the Nightstand

      The cart sat alongside my nightstand, and a few things lived there instead:

      • Night light and sound machine: The Hatch Rest+ was already set up before the baby arrived. Soft enough to see by during feeds, controlled from my phone so I never had to get up to adjust it. One of those things I’d buy again without hesitating.
      • Phone charger — sounds obvious until it’s 3am and your battery is at 4%.
      • A small notebook for tracking feeds and nappy changes. When you’re running on broken sleep and someone asks when she last fed, you will genuinely not know. A Paperage Pocket Notebook next to the bed kept me sane in those early weeks.

      Coming Home to a Prepared Space

      I remember walking through the door after the hospital — exhausted, sore, overwhelmed in the most beautiful and terrifying way — and looking at that cart and feeling something I hadn’t expected.

      Ready.

      Not calm, because nothing about those first days is calm. But prepared. Like the version of me from a few months ago had already done all the planning and the worrying, so the version of me holding a two-day-old didn’t have to.

      That cart sat next to my bed for the better part of three months. I restocked it, reorganised it as our needs changed. But those first few weeks — it was exactly what I needed it to be.

      Build the cart. Do it while you have the energy. You will come home from the hospital and your past self will have taken such good care of you. 🤍

      – Lots and lots of love, Mama Rooted.

      Quick Recap

      Lets keep everything in one place because honestly, we don’t need further complexities!

      📌 Save this and send it to every pregnant mama you know. She needs this list before her due date.